I'm getting better: Puffy Strap Mules
As I mentioned in my previous post I learned quite a few things while making my first pair of shoes and I was eager to try again. My original plan was to make a basic pair of mules, similar to my first pair but with more coverage to make them less flip-floppy. However after I had cut the uppers and lining I decided I wanted to do some a little more interesting with this pair.

Top Row: Vince Camuto Mirinda, Steve Madden Kenley Bottom Row: Nine West Yoyo, Dolce Vita Natie All pics from dsw.com
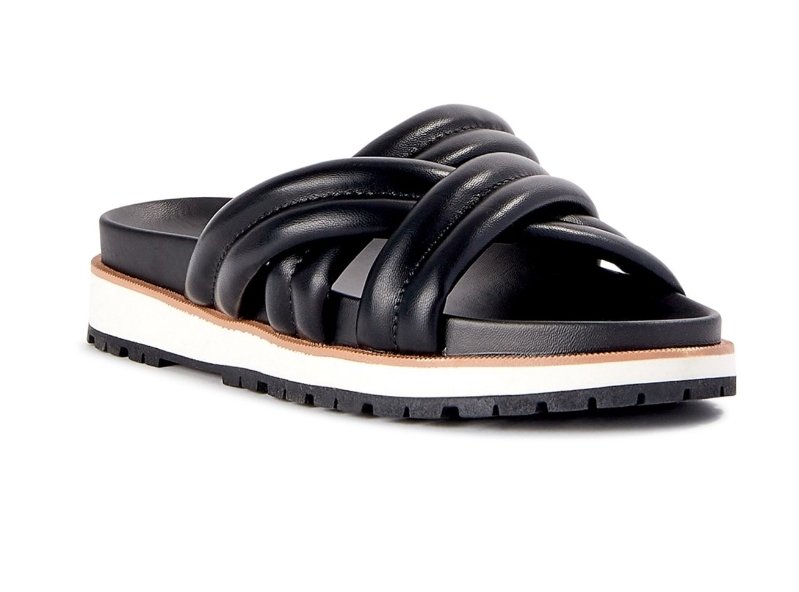
It seems that the puff braid band look is all the rage right now and I like that look, but I wanted something a tad different. I really like my these slides from WalMart that I grabbed early this spring. So I decided to replicate this look instead, it still has the puff look, but not the braid.
A plus for this style of shoe, a strap or banded sandal, is you really don't need to create a pattern. All you need to do is cut and sew strips that are long enough to wrap over the last/your foot and space them smartly.

Preparing the Insole
https://videopress.com/v/aYeHzVP8?resizeToParent=true&cover=true&posterUrl=https%3A%2F%2Fvideos.files.wordpress.com%2FaYeHzVP8%2Fwp-1653018491664_mp4_std.original.jpg&preloadContent=metadata&useAverageColor=true
First I shaped and trimmed the toe of the insole to square it off which can be done with an open toe shoe. For closed toe shoes the insole shape needs to match the shape of your last. A lesson learned from my first attempt was that some type of cushion was necessary. I love the IG DIY community because when I asked for foam recommendations Mimi G, Jasika, Jaime and Gracie quickly came through. I ended up grabbing this off Amazon and it worked great. I simply traced the insole shape onto the foam, cut it and adhered it to the insole with Aquilum 315. It definitely would've helped to have a Dremel to smooth the foam edges so I will be getting that soon.

Insoles done
Then I covered the sole like I did with the first pair by adding a strip to the edges and fully covering the toe area. I decided to go ahead and install the insole sock because on my previous pair I found it a little difficult to do after the shoe was lasted. I cut it using my pinking sheers for a fancier look and glued them to the insole. FYI the plan was to leave the back portion where you attach the heel unglued until after the heel was screwed on but I got carried away and glued the whole thing. I still made it work by prevent the sock and insole from making contact.
Making and Lasting the straps
Sadly I forgot to record this part.

These are the straps after they've been lasted.
I decided I wanted the straps to be about 1" wide so I cut my fabric in an 3" wide strip about 18" long strip. I folded this is half with right sides facing and sewed with about a 3/8" seam allowance. Next turned the tube inside out and I marked the middle of the strip lengthwise and sewed along that line. Then I used polyfill to stuff the two side of the strap. The 18" strip provide more than enough length for me to create the upper strap for both shoes. However stuffing the strips proved to be more difficult than I expected as the channels were narrow. So for the lower strap I increased the width to 4" and stuff the strap before sewing the middle stitch. It was a little stressful getting in all under the presser foot, but it worked!
Attaching the Soling

Adhering the sole is the trickiest part of the shoe making process. There's only one shot at it because the adhesive for this part is so strong. Also the fit needs to be precise because there isn't an easy way to trim it after it's attached. Before attaching the sole I filled in the gaps under the insole with cork filler to allow for a flat surface for the sole to adhere.
https://videopress.com/v/jYc42hIc?resizeToParent=true&cover=true&posterUrl=https%3A%2F%2Fvideos.files.wordpress.com%2FjYc42hIc%2Fwp-1653019566269_mp4_std.original.jpg&preloadContent=metadata&useAverageColor=true
I'm still struggling with this step, but this isjust my second attempt. This time I learned to trim away and grade down more of the straps for level surface and to focus a bit more on the glue placement and coverage.
Covering and Attaching the Heels
I made a pattern for the heel covering when I made the black mules by tracing the outline of the heel. I used the same pattern here. This is also attached using the Aquilium glue though the drying time on the plastic heel takes a bit longer. Once the leather was attached and trimmed I secured the heel tap with a hammer.
https://videopress.com/v/DfJhk6P5?resizeToParent=true&cover=true&posterUrl=https%3A%2F%2Fvideos.files.wordpress.com%2FDfJhk6P5%2Fwp-1653019566305_mp4_std.original.jpg&preloadContent=metadata&useAverageColor=true
At this point you know you are almost done!!! To attach the heels you need a drill to create pilot holes for the screws. My husband had just purchased this drill for me for Mother's Day and I was excited to use it. I used a 3/8" drill bit and #8 x 3/4" flat phillips head screws. This time I used three screws for each heel, placing one on either side of the shank and one in the back. Lastly I covered the screws with a tiny patch of foam and then secured the insole sock over that.
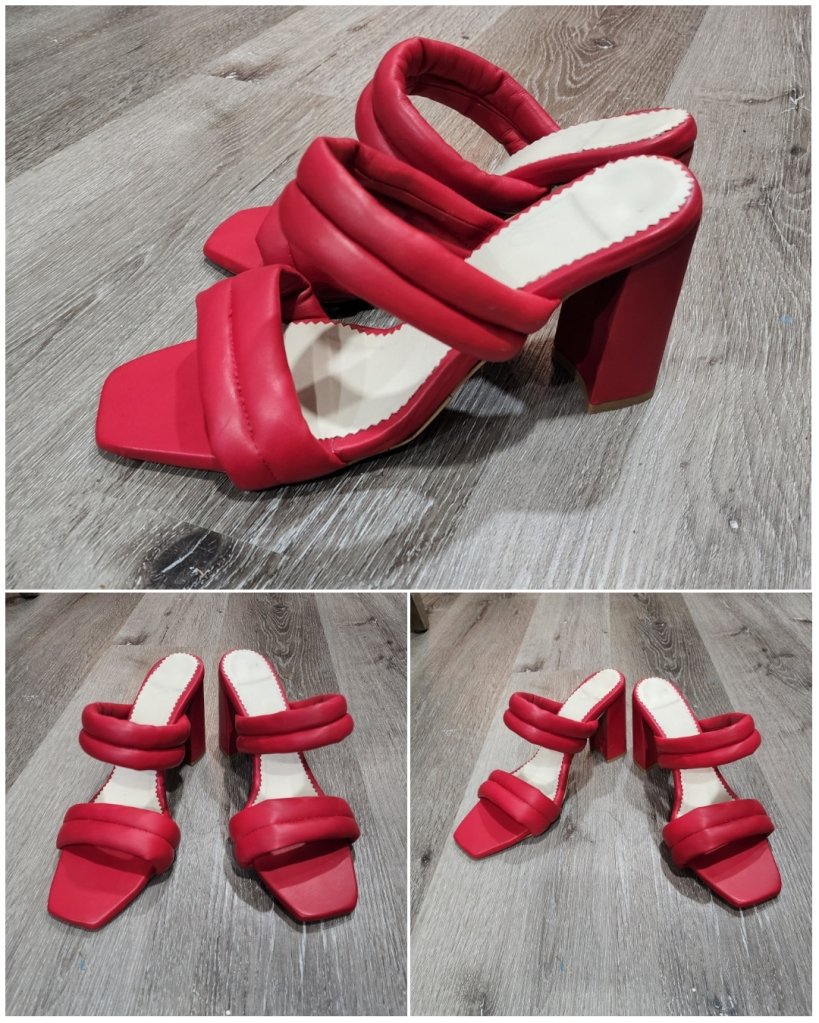
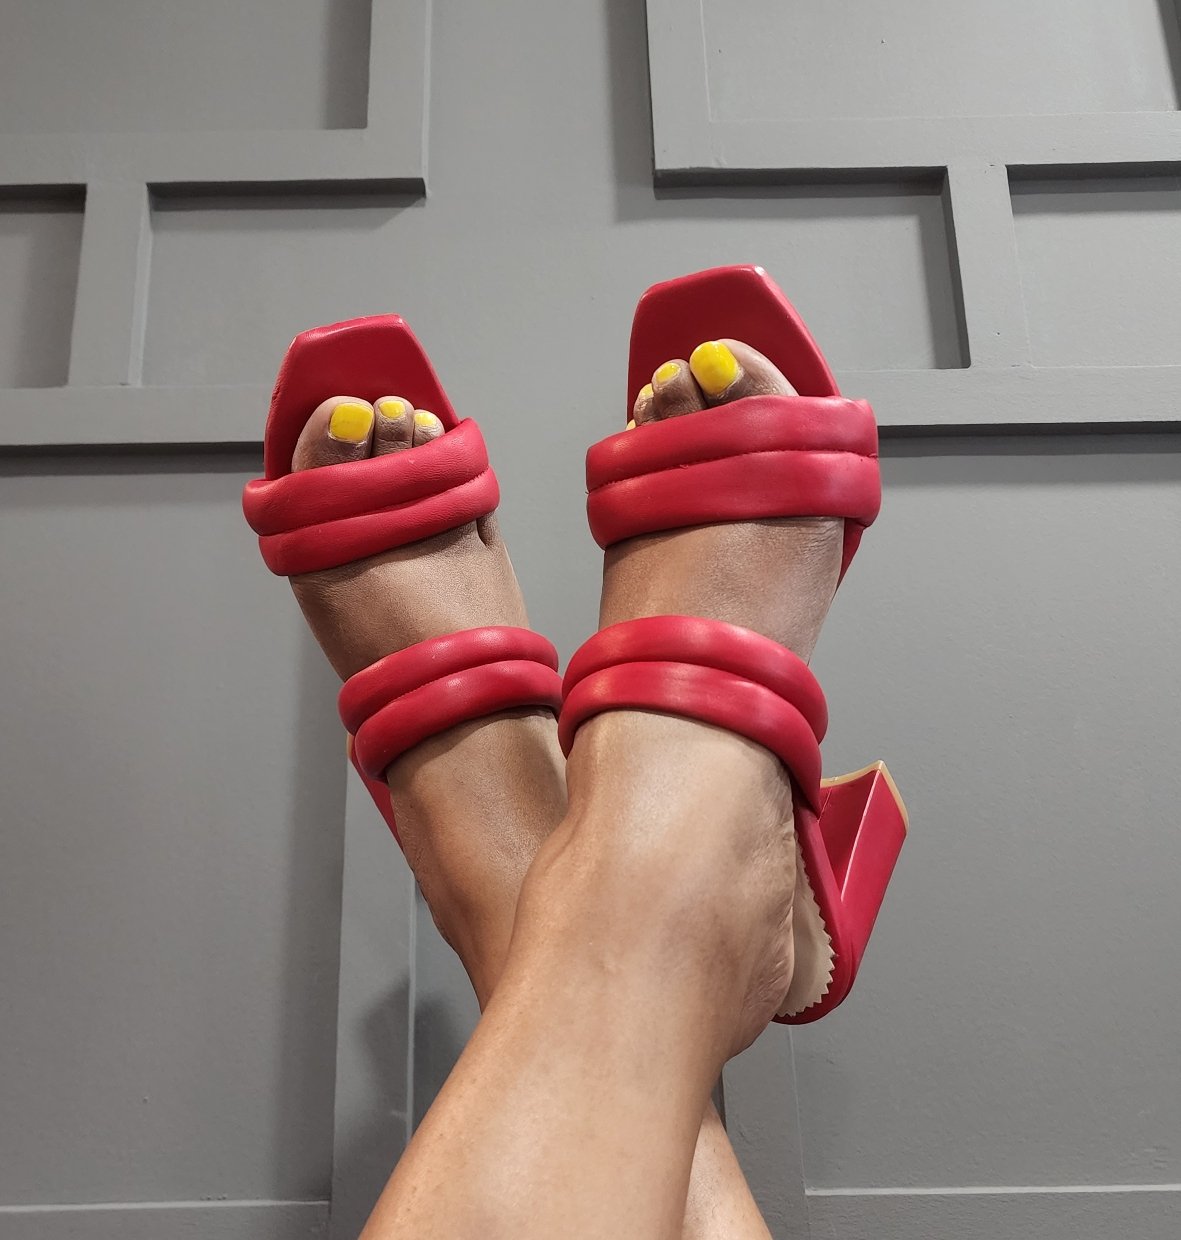
ALL DONE!
Of course there were still mistakes with this pair, but I feel they are wearable and that's a win for me.
https://videopress.com/v/y5mpFGzw?resizeToParent=true&cover=true&muted=true&persistVolume=false&posterUrl=https%3A%2F%2Fvideos.files.wordpress.com%2Fy5mpFGzw%2Fwp-1653577699717_mp4_std.original.jpg&preloadContent=metadata&useAverageColor=true