
Mixed Material Bomber: Know Me 2059 Modified
Know Me 2059
Great example of how you can hack a great pattern to meet your needs!
Overview:
Skill Level: ★★★
Sewing Time: a full day
Pattern Rating: ★★★★★
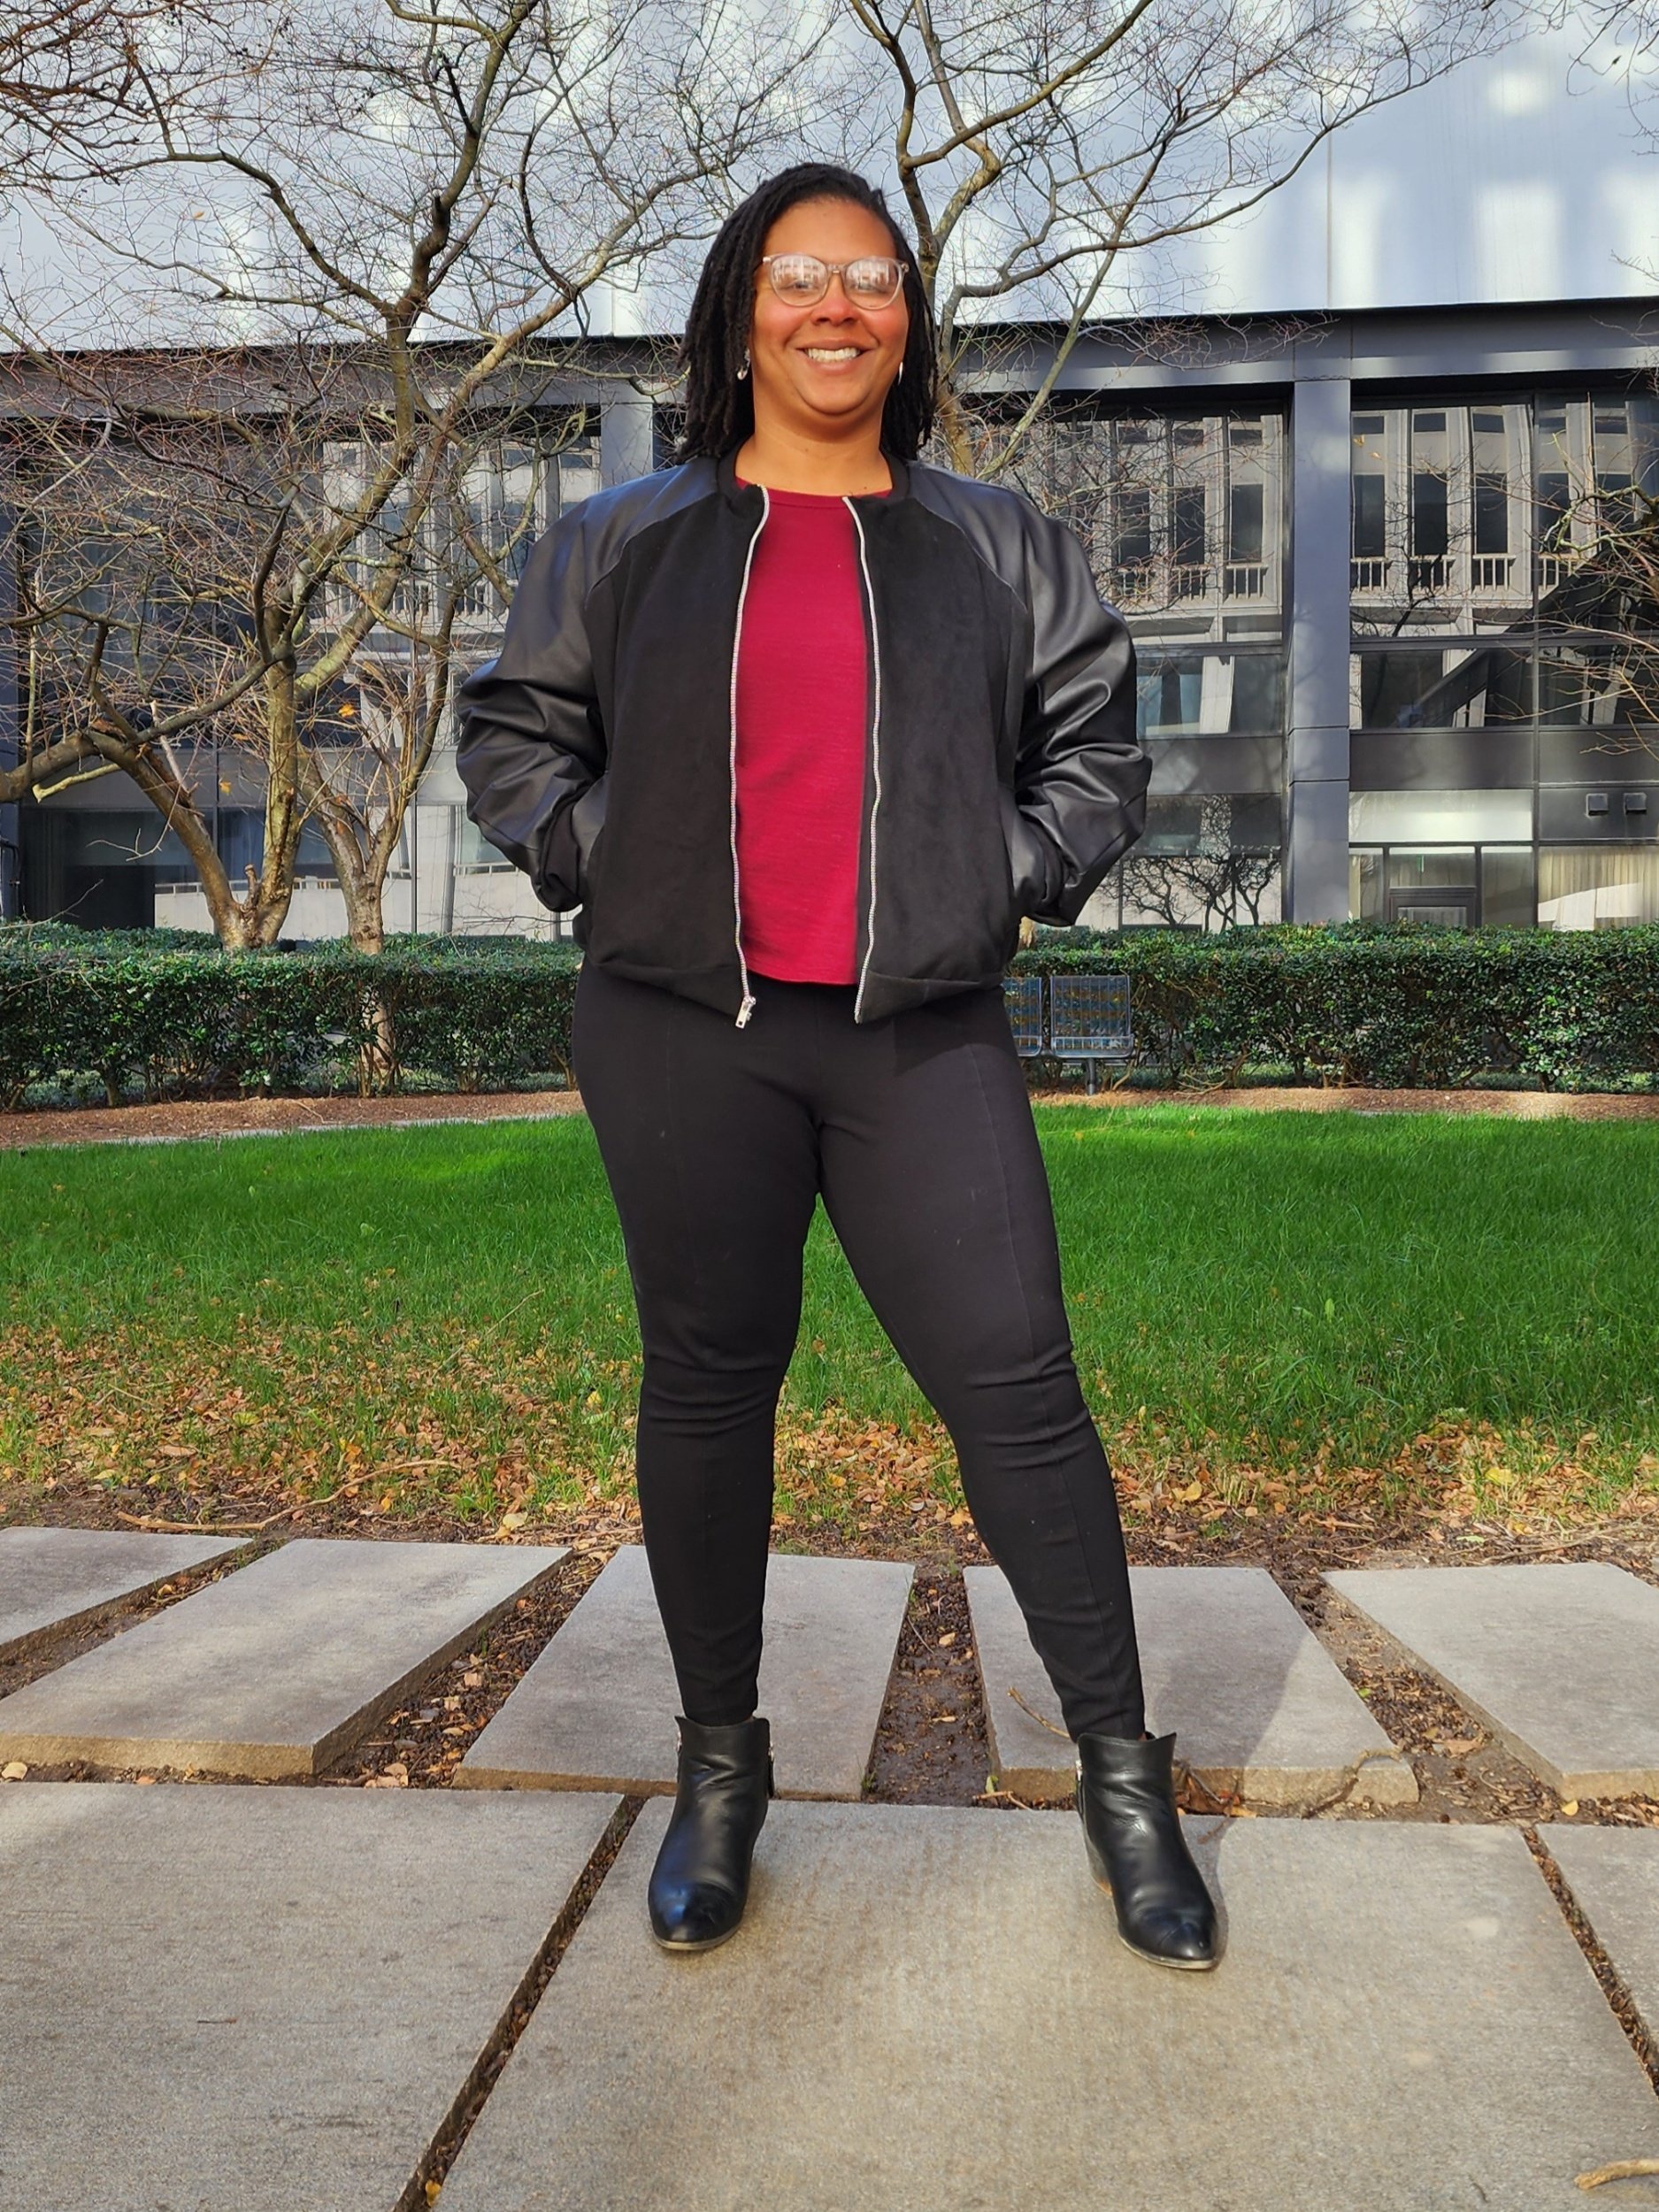
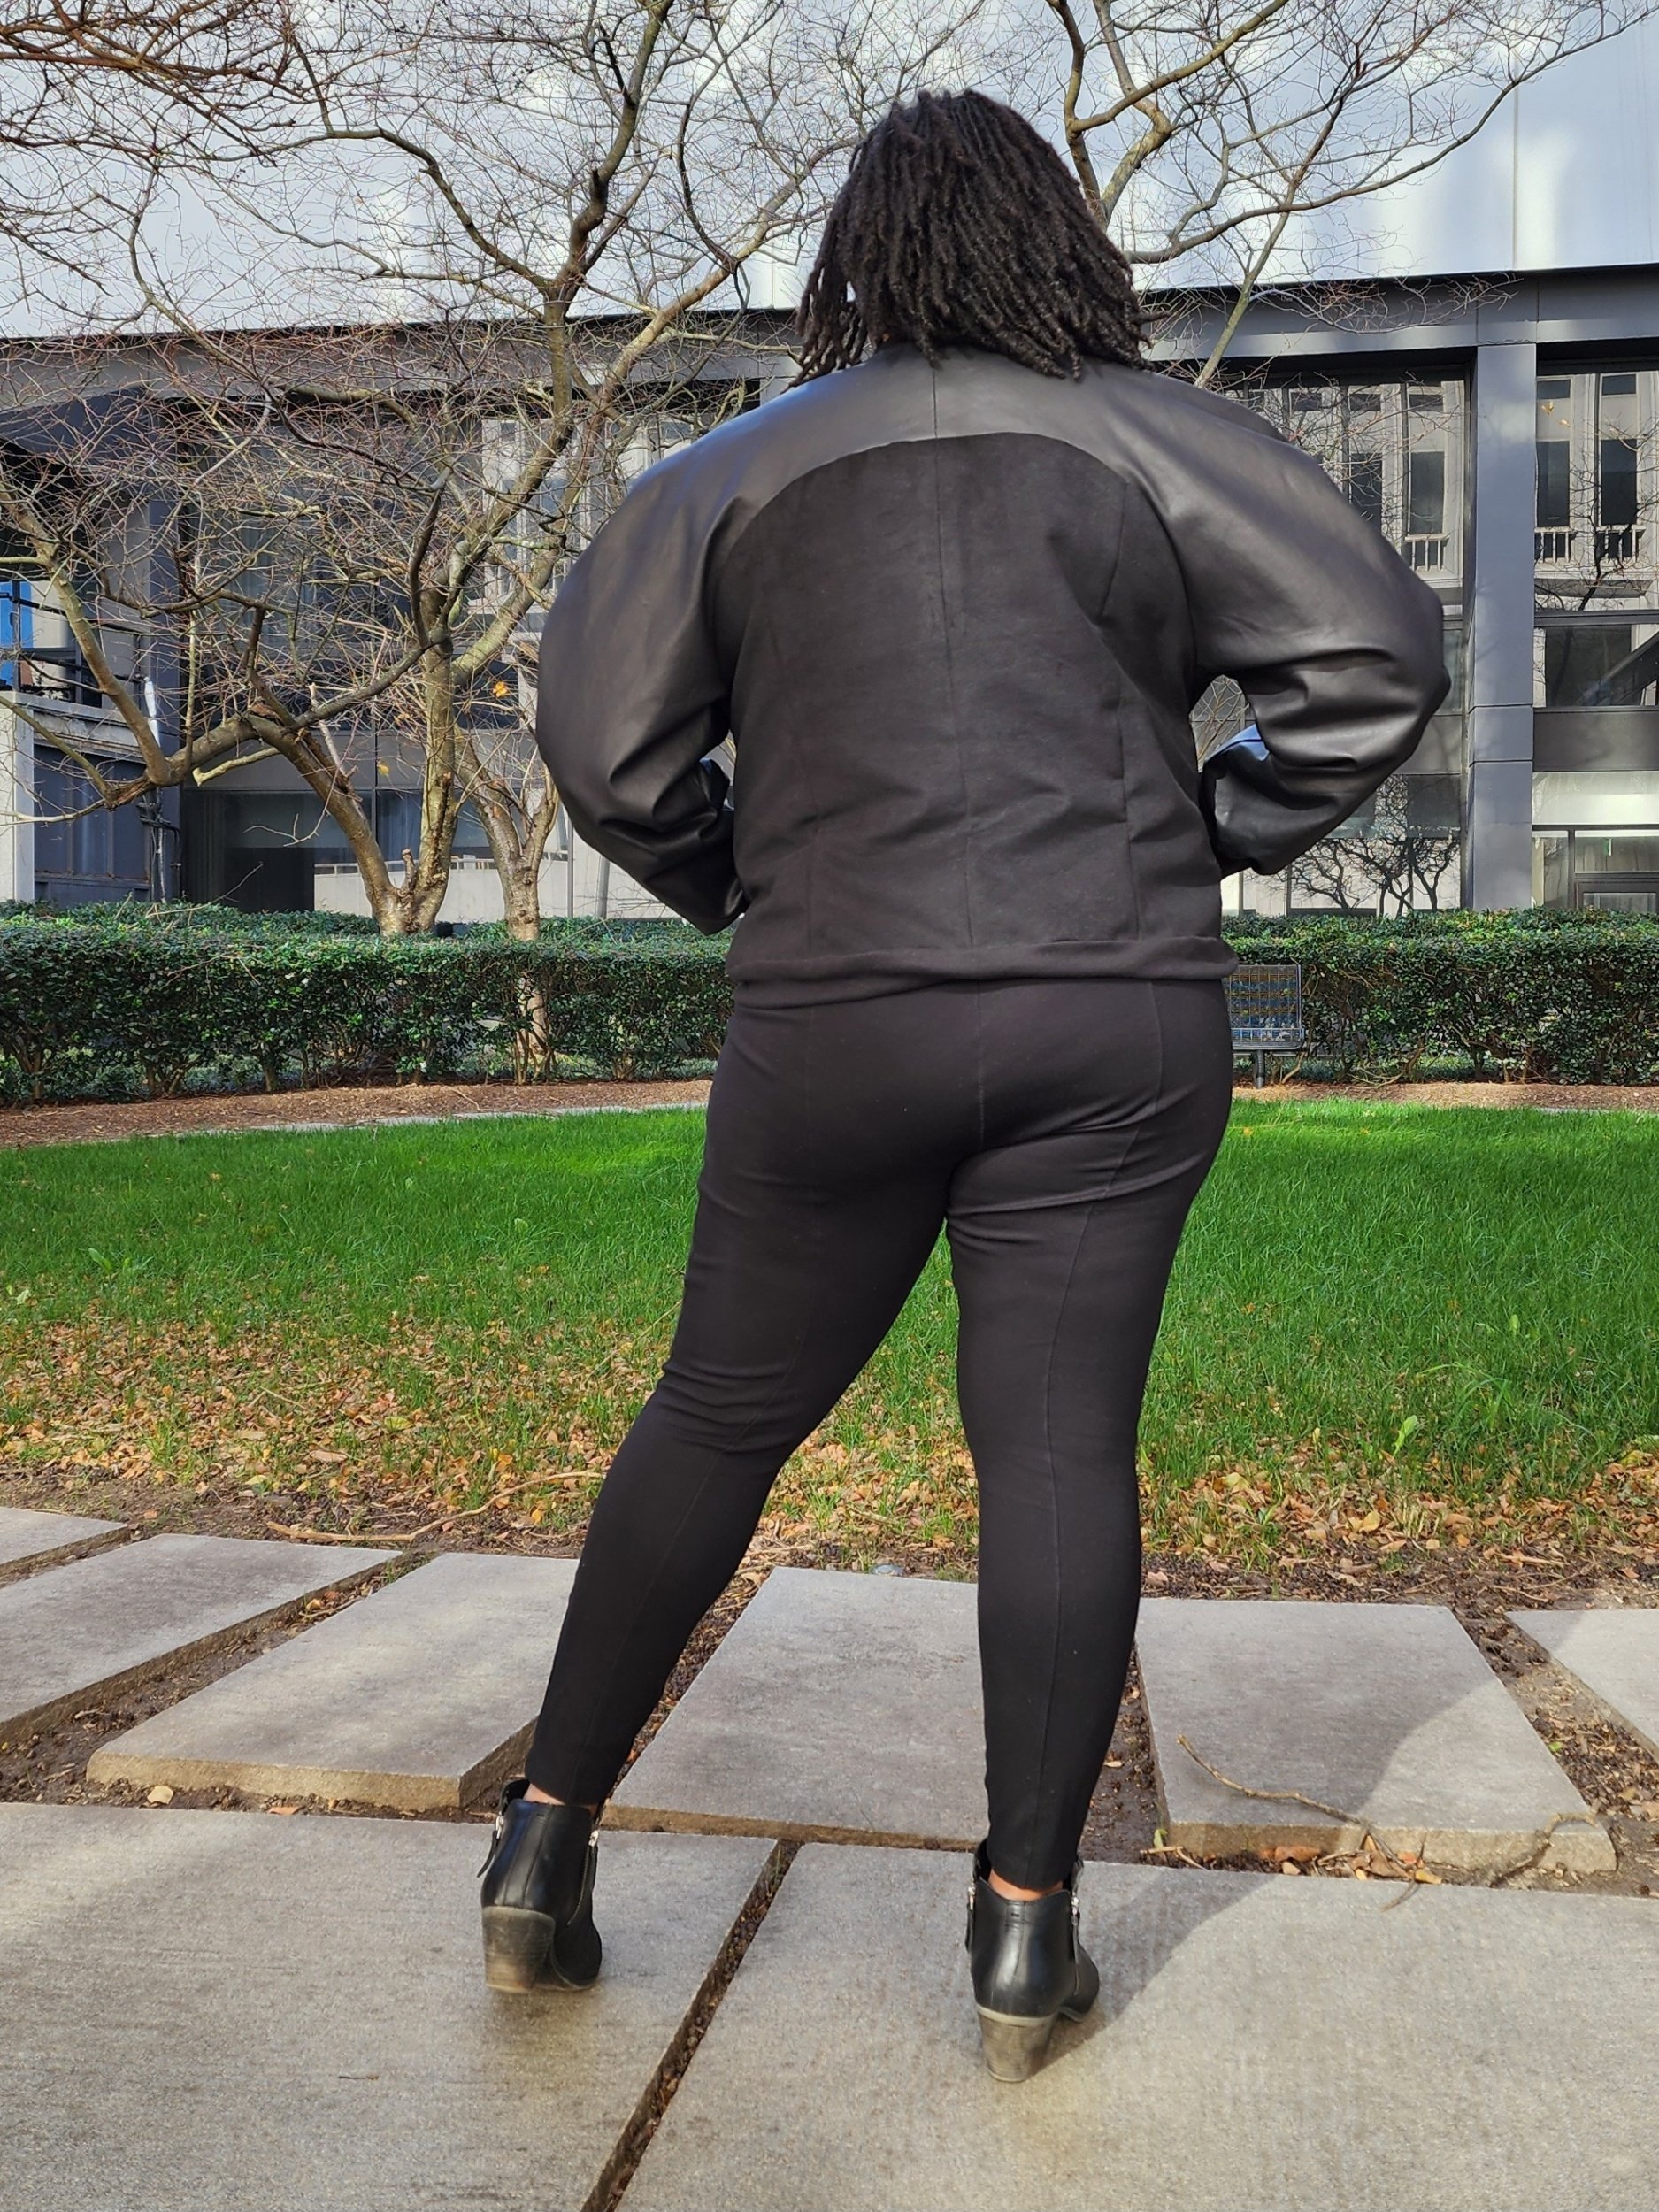
I was debating the coat at first because while I loved the design - especially the sleeves - I live in the southern US where you only need a couple of coats. But after I saw Carmen’s hacked bomber version I quickly decided I needed a new bomber.
Pattern:
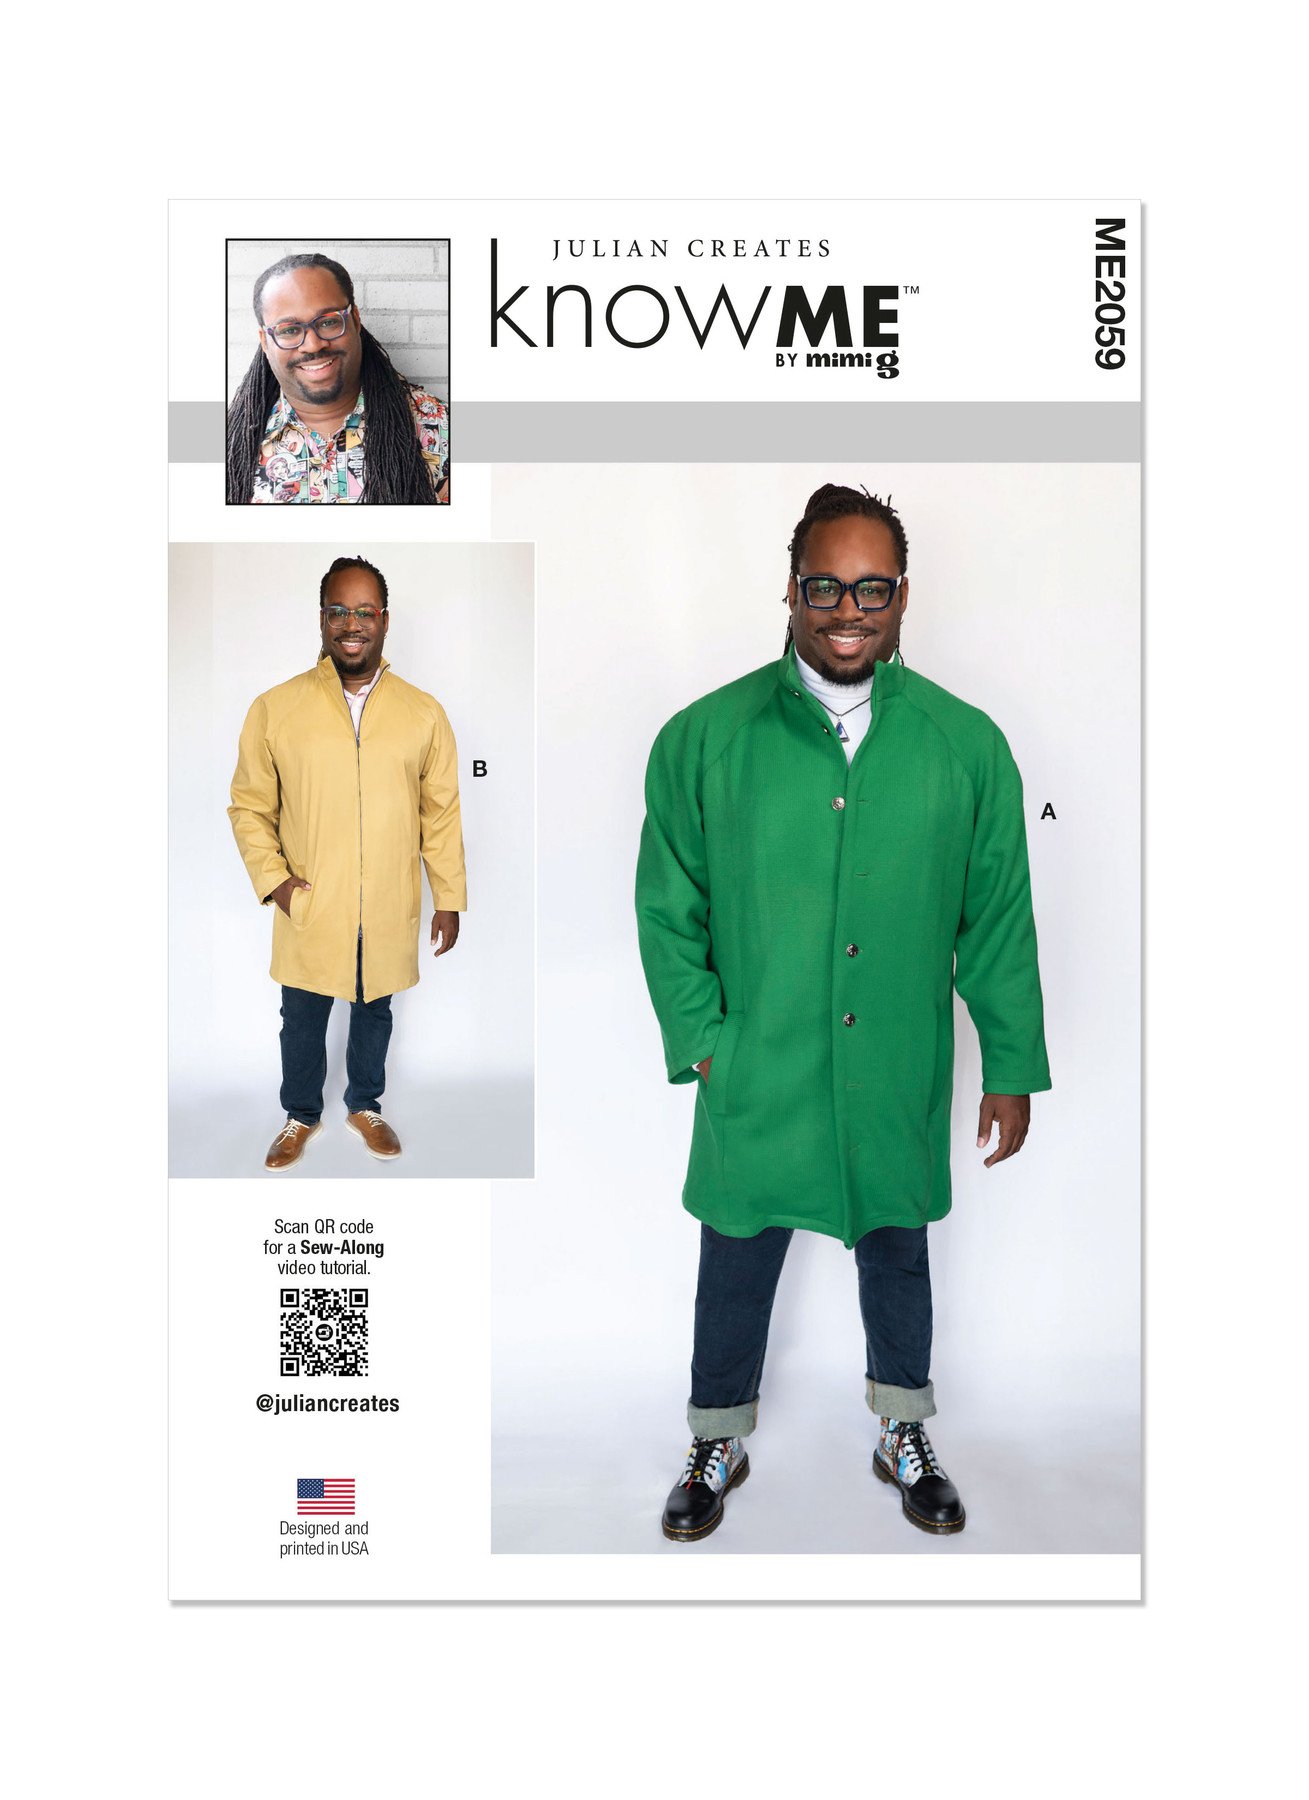
I sewed this live with the designer himself, Julian, on tiktok for Black Sewing Networks fall Know Me sewalong series. Have you been tuning in to BSN? Check the schedule here as there’s a live sew everyday!
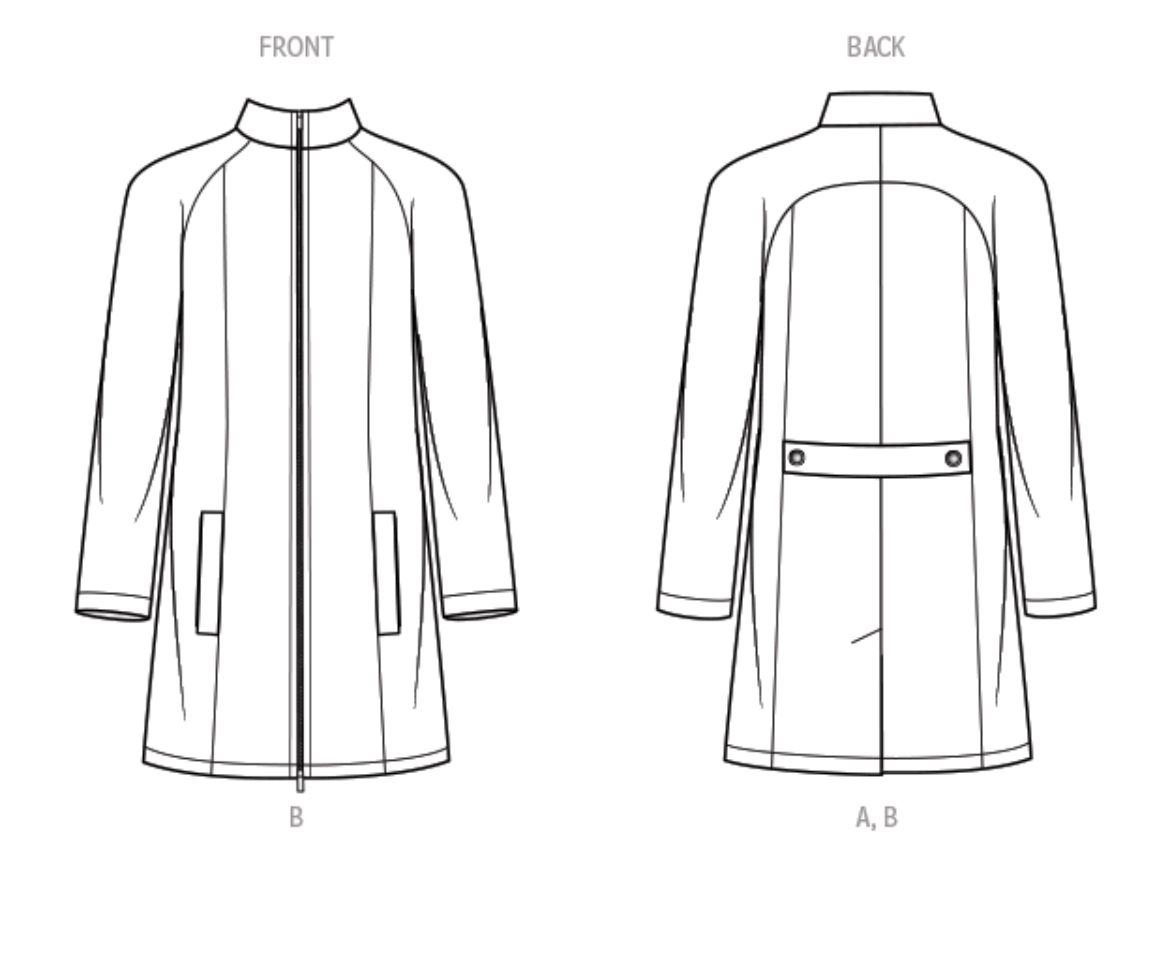
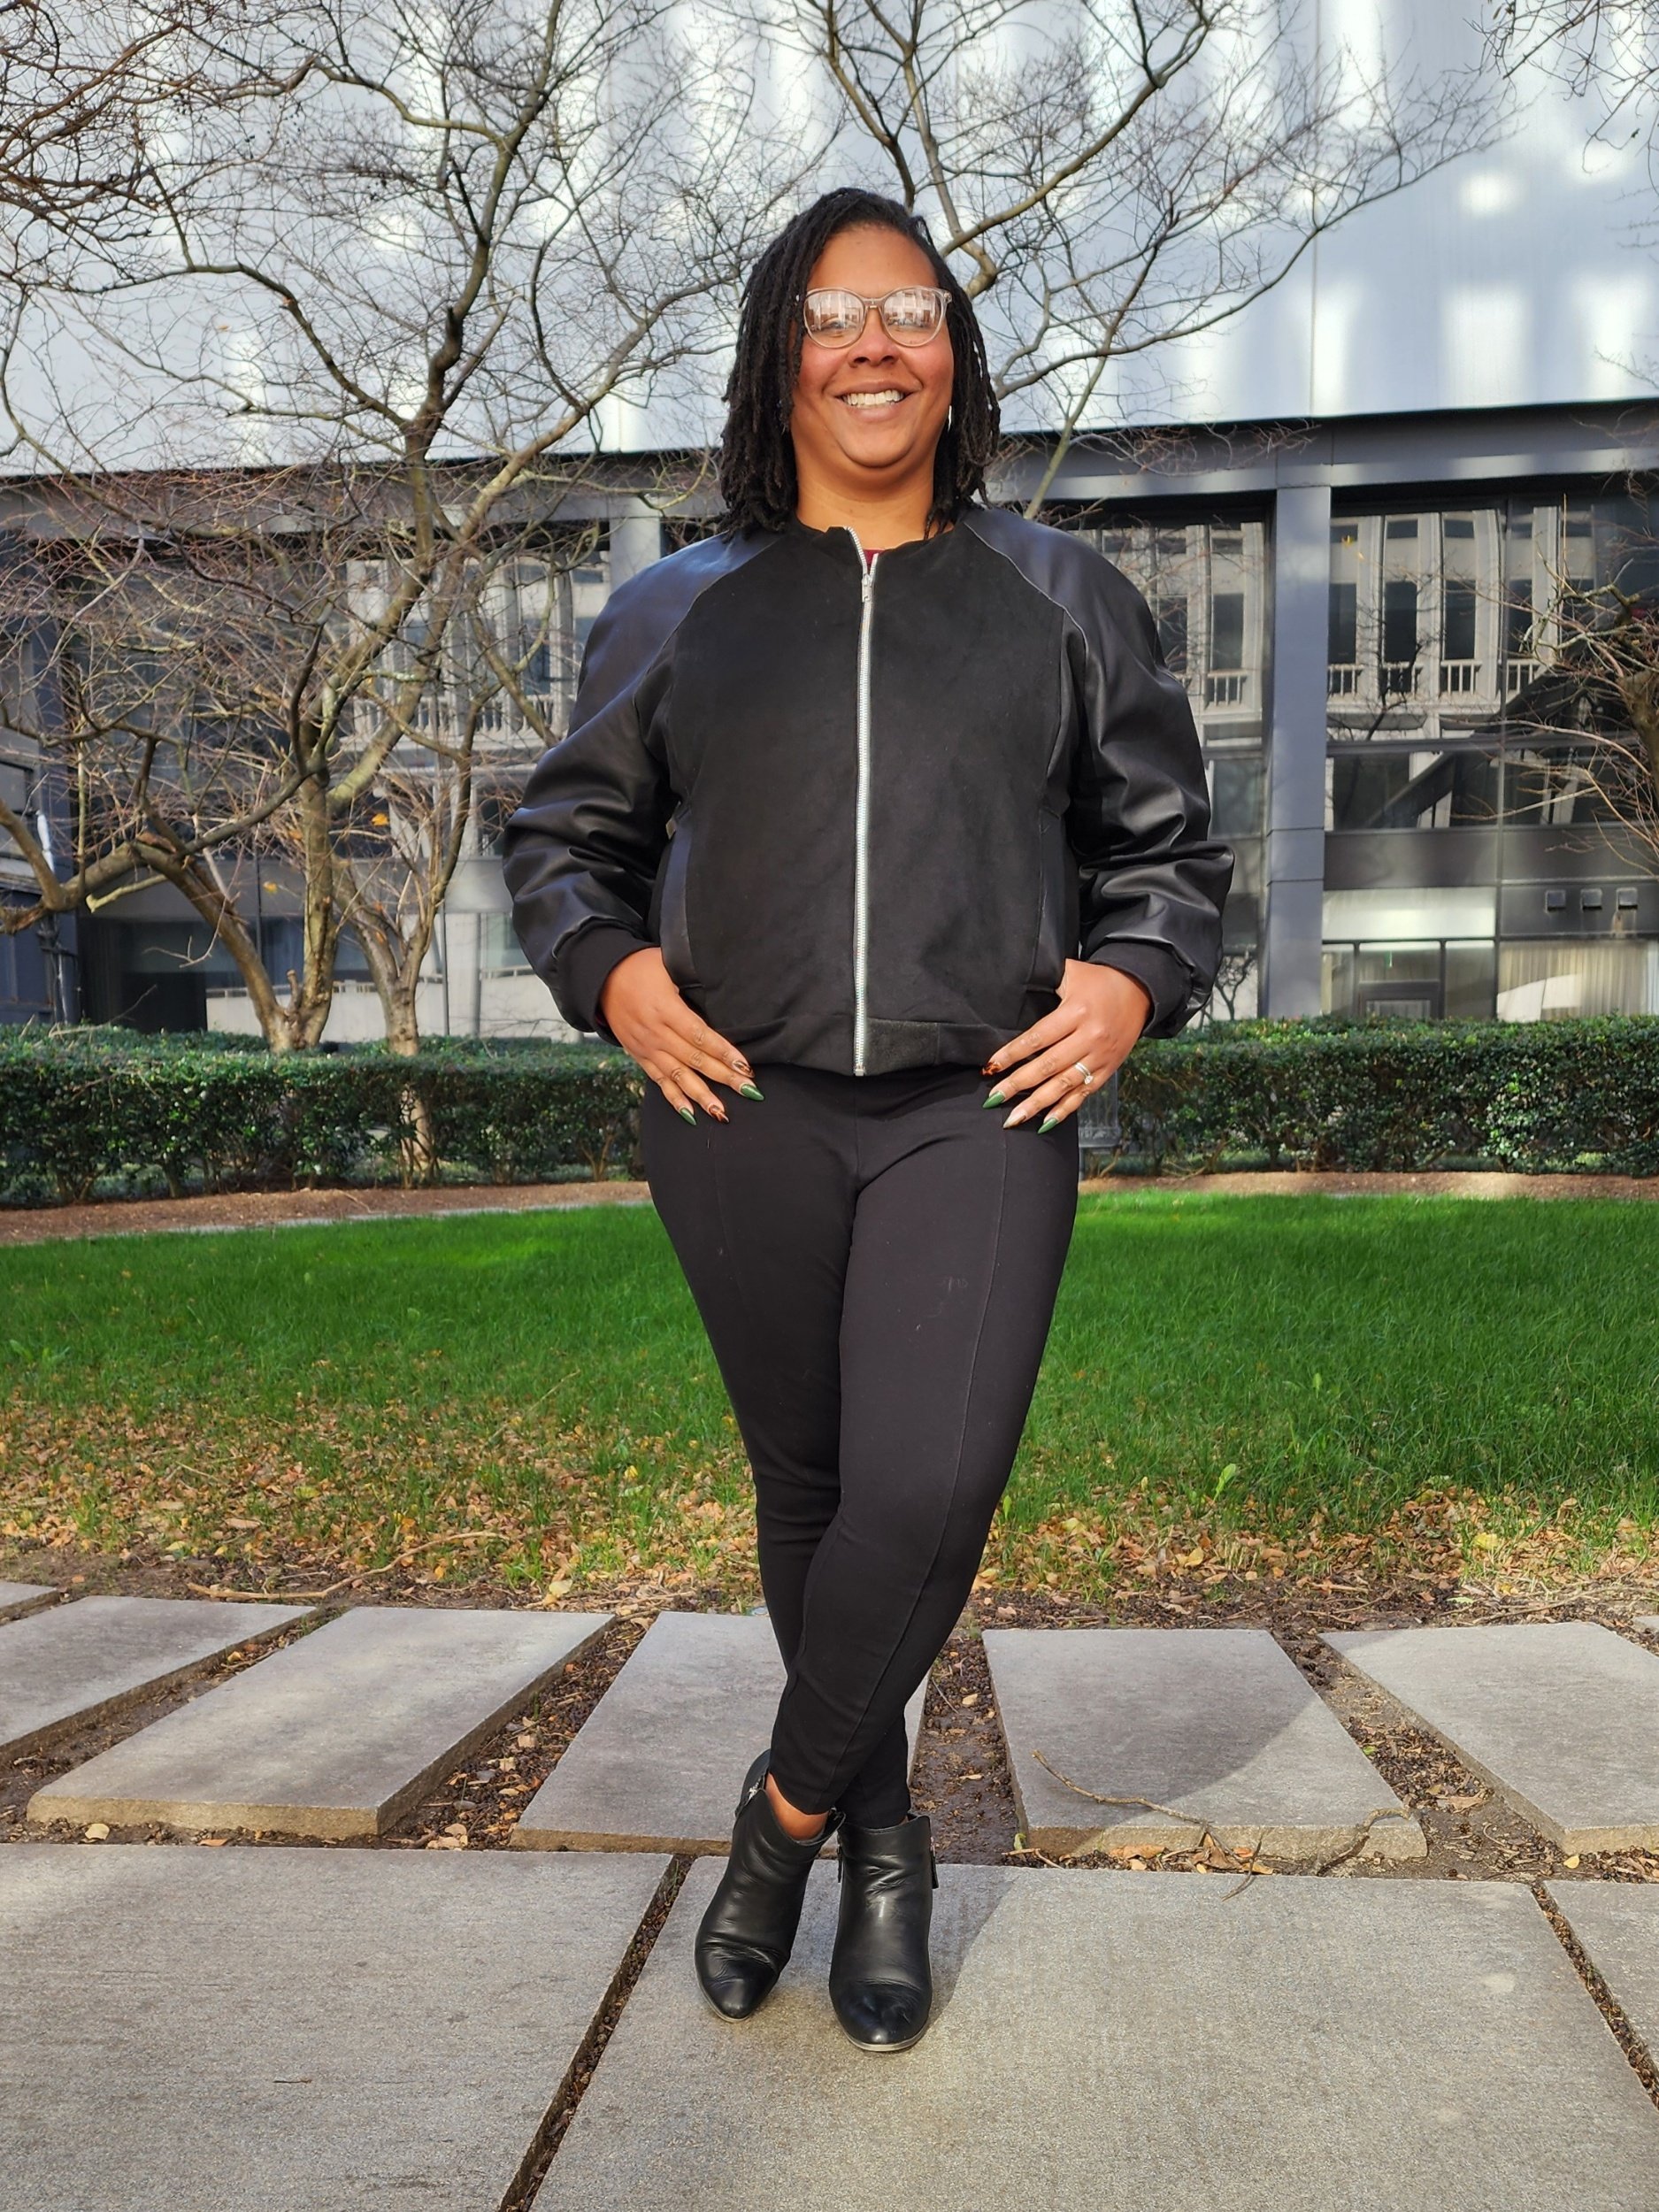
Sure I hacked this pattern, but it’s amazing as designed. I learned that this type of sleeve is called a saddle sleeve. They look similar to raglan from the front, but notice how they come together at the center back seam. The panels make this an easy coat to adjust which is great if you’re concerned about sewing a mens coat. I also love the welt pockets and the option for a zipper or button/snap closure. I also think the length is perfect if you live in a cold weather climate.
If you’ve never joined a BSN live sew or anyone live streamed sewing session they are so fun! Sewing this live with Julian was great because he shared how to fit the body and the sleeve. Also collectively as a group of hosts we were giving each other suggestions and making modifications on the fly.
Short of the modifications I made the jacket/coat comes together easily. Again the seams make it easy to fit and adjust.
Fabric:
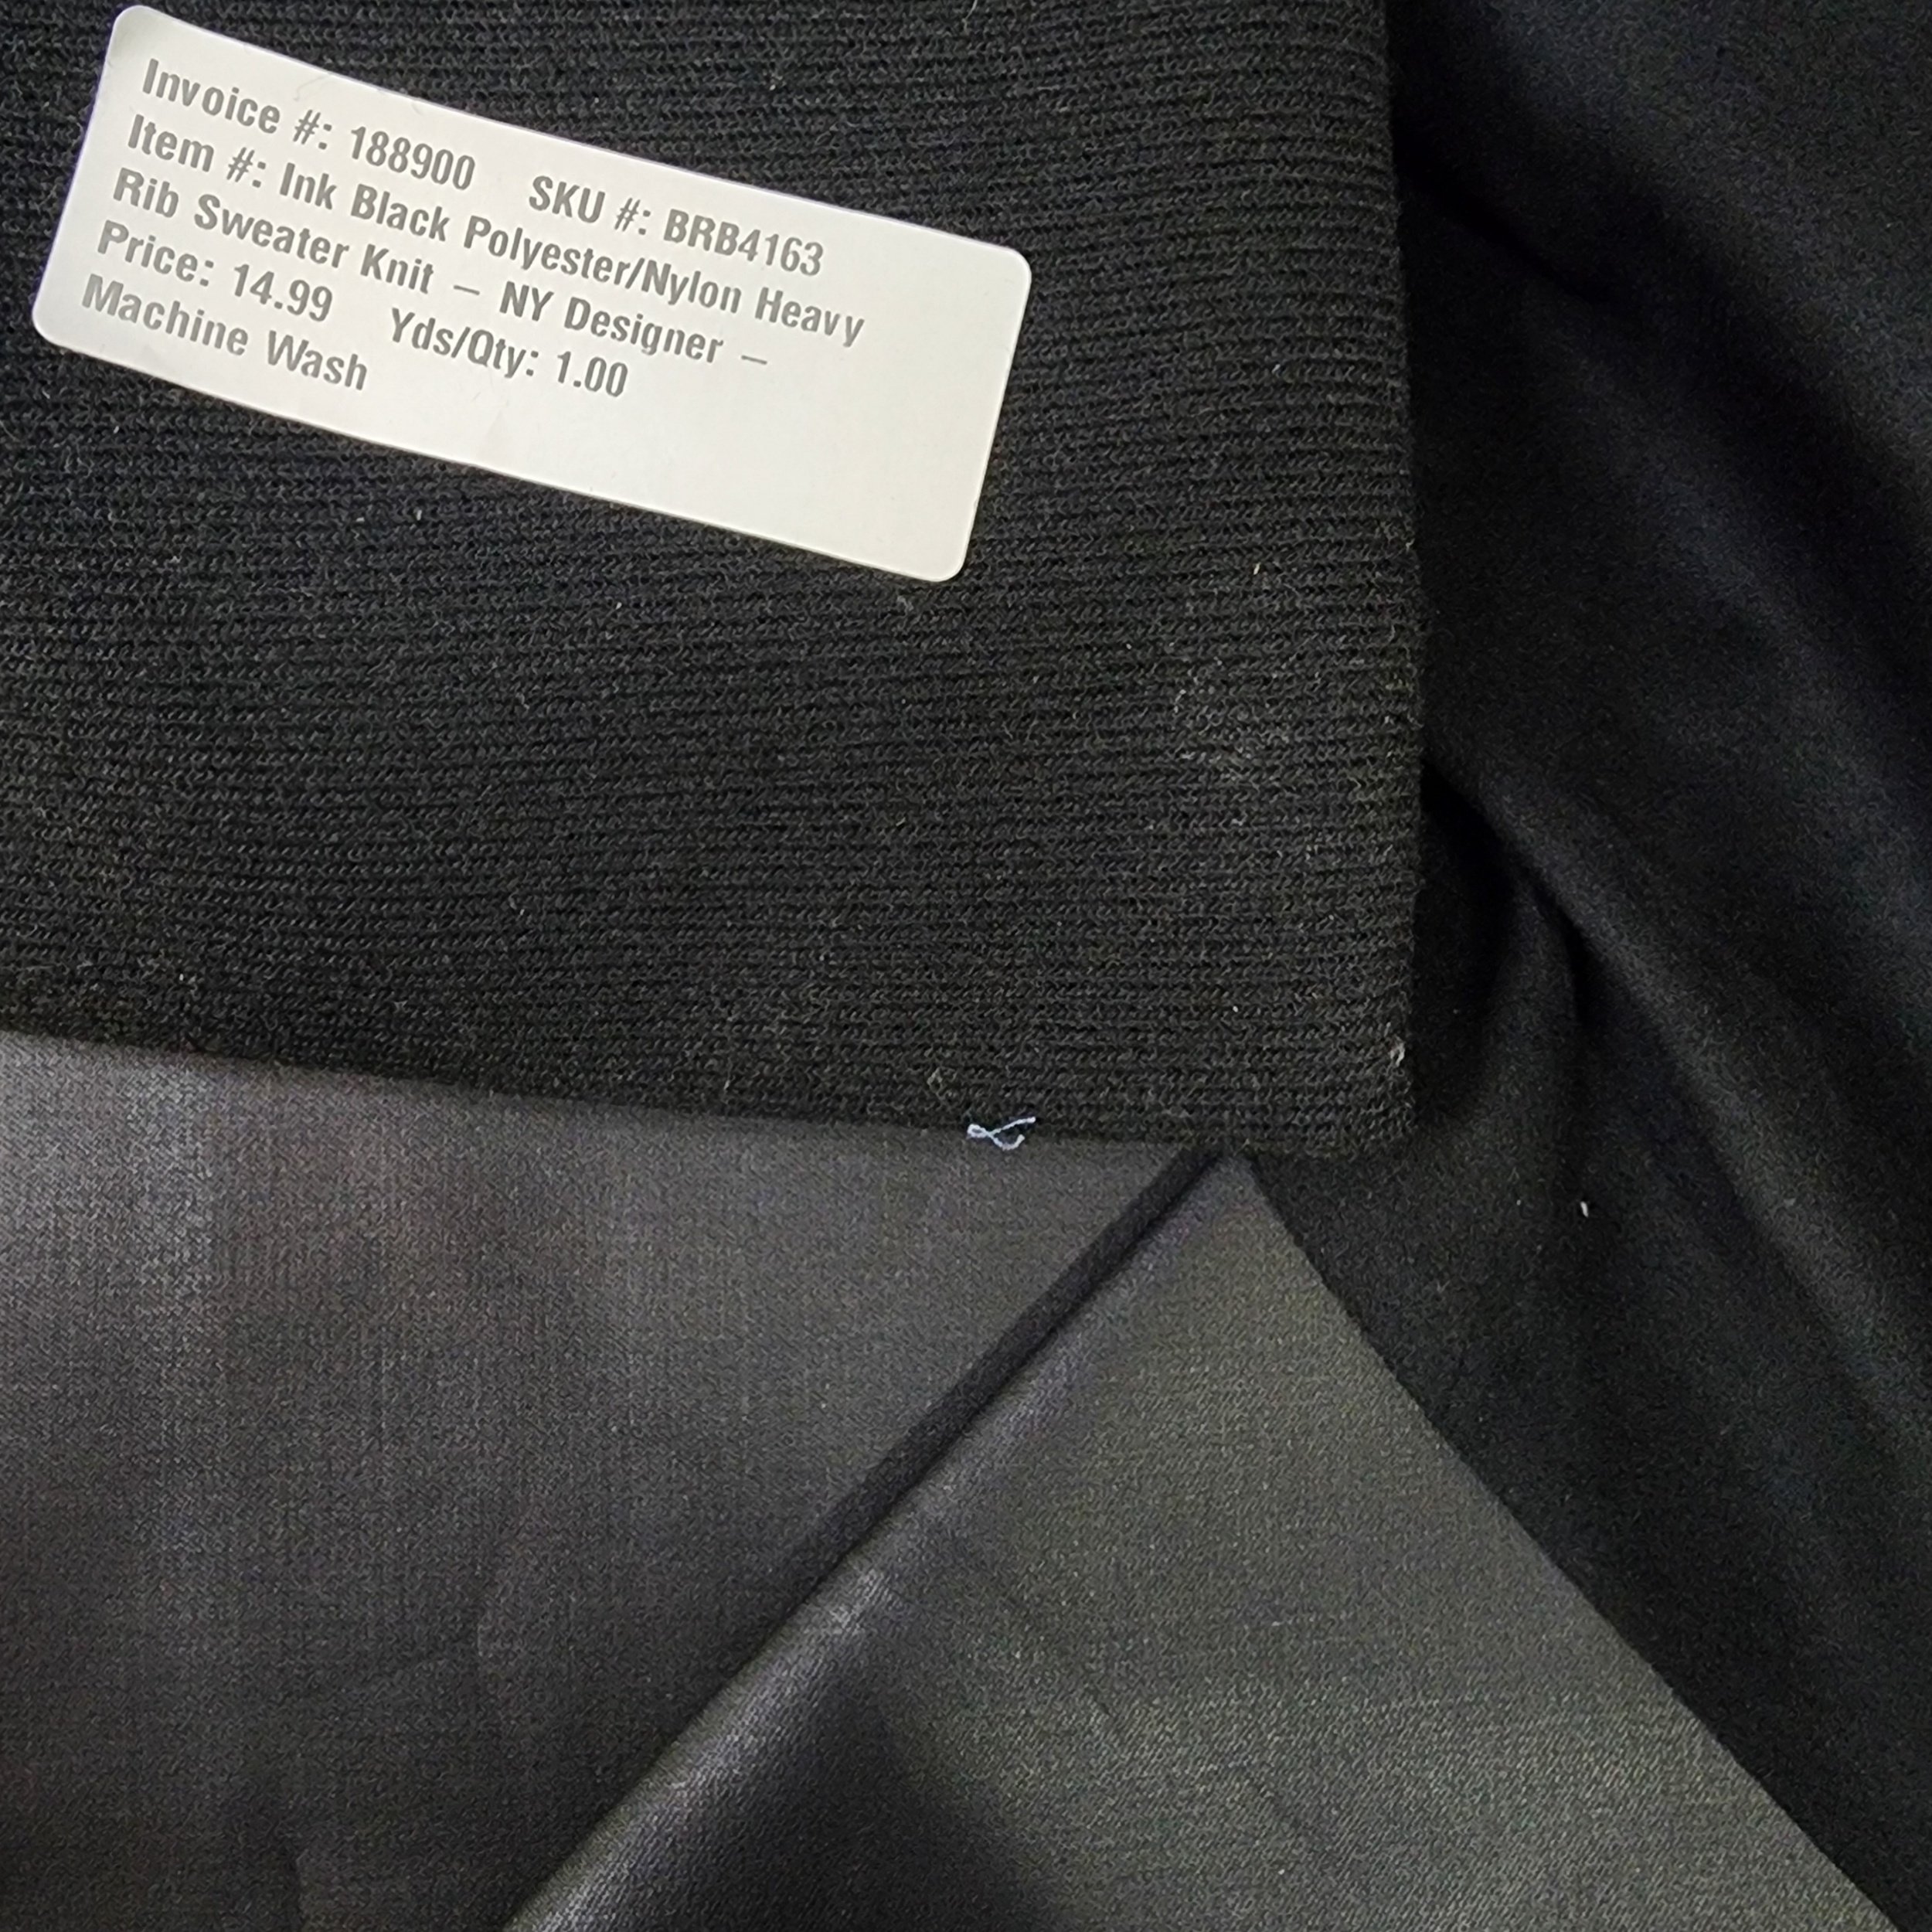
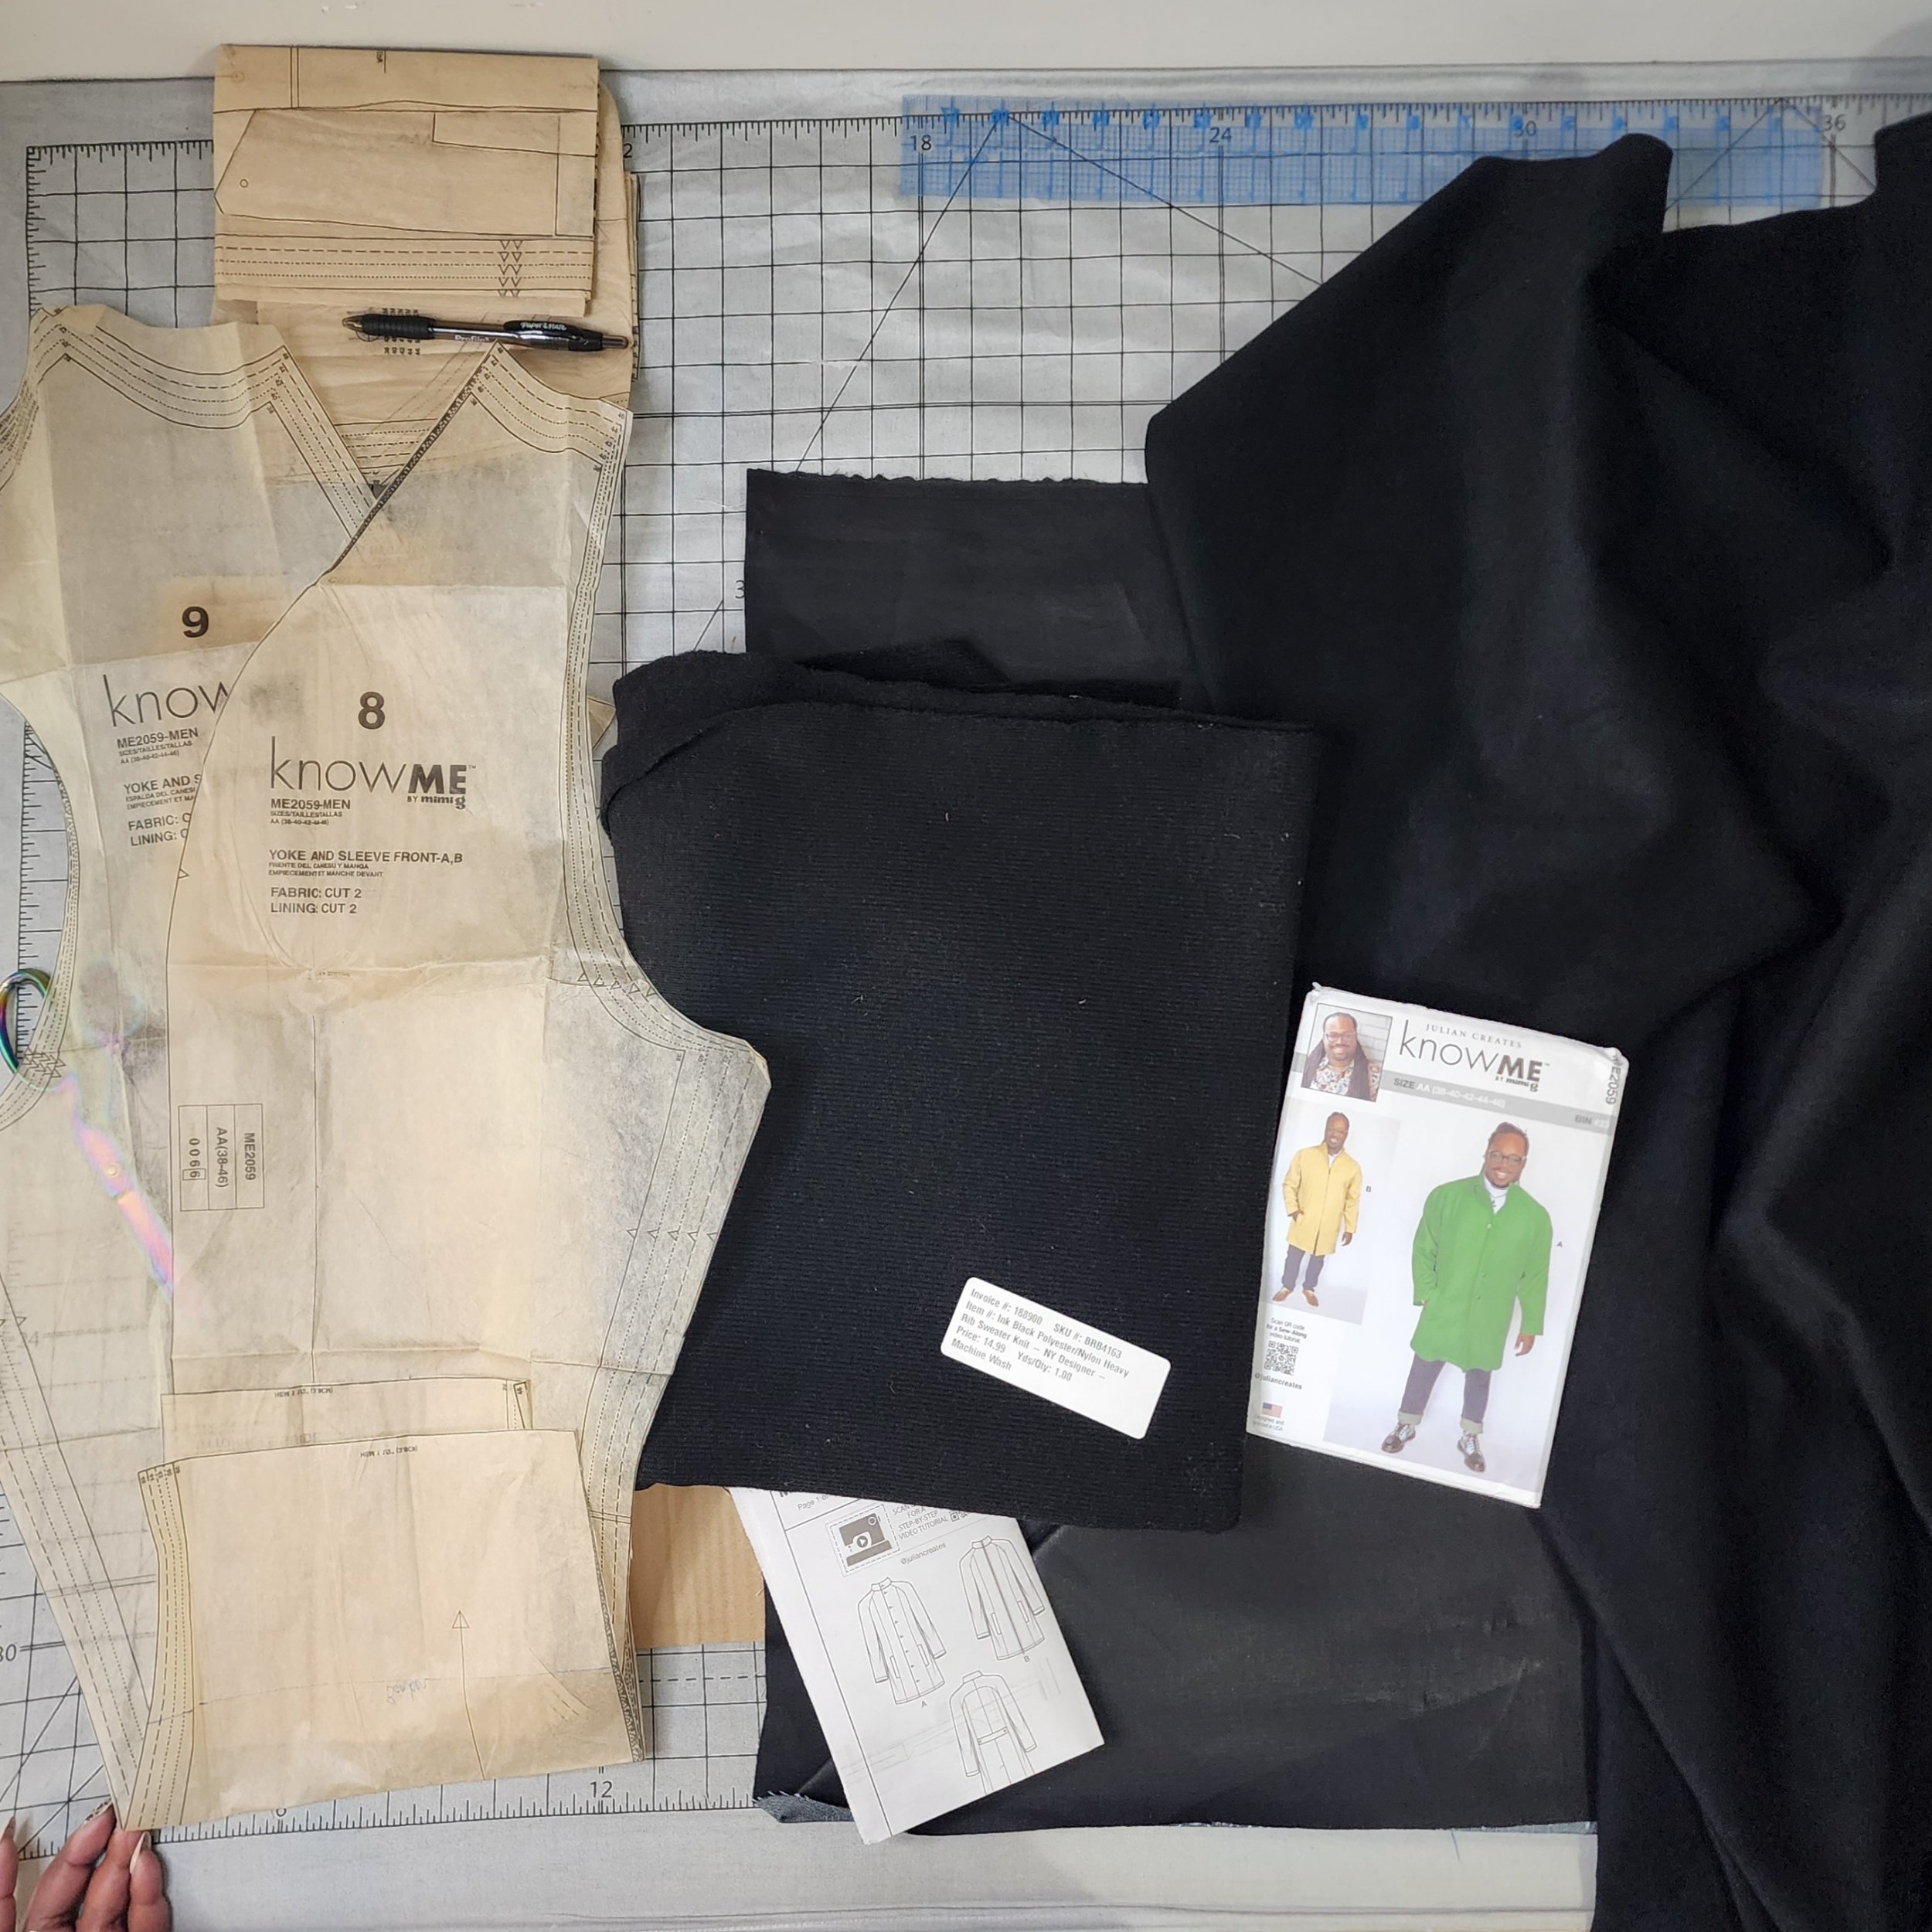
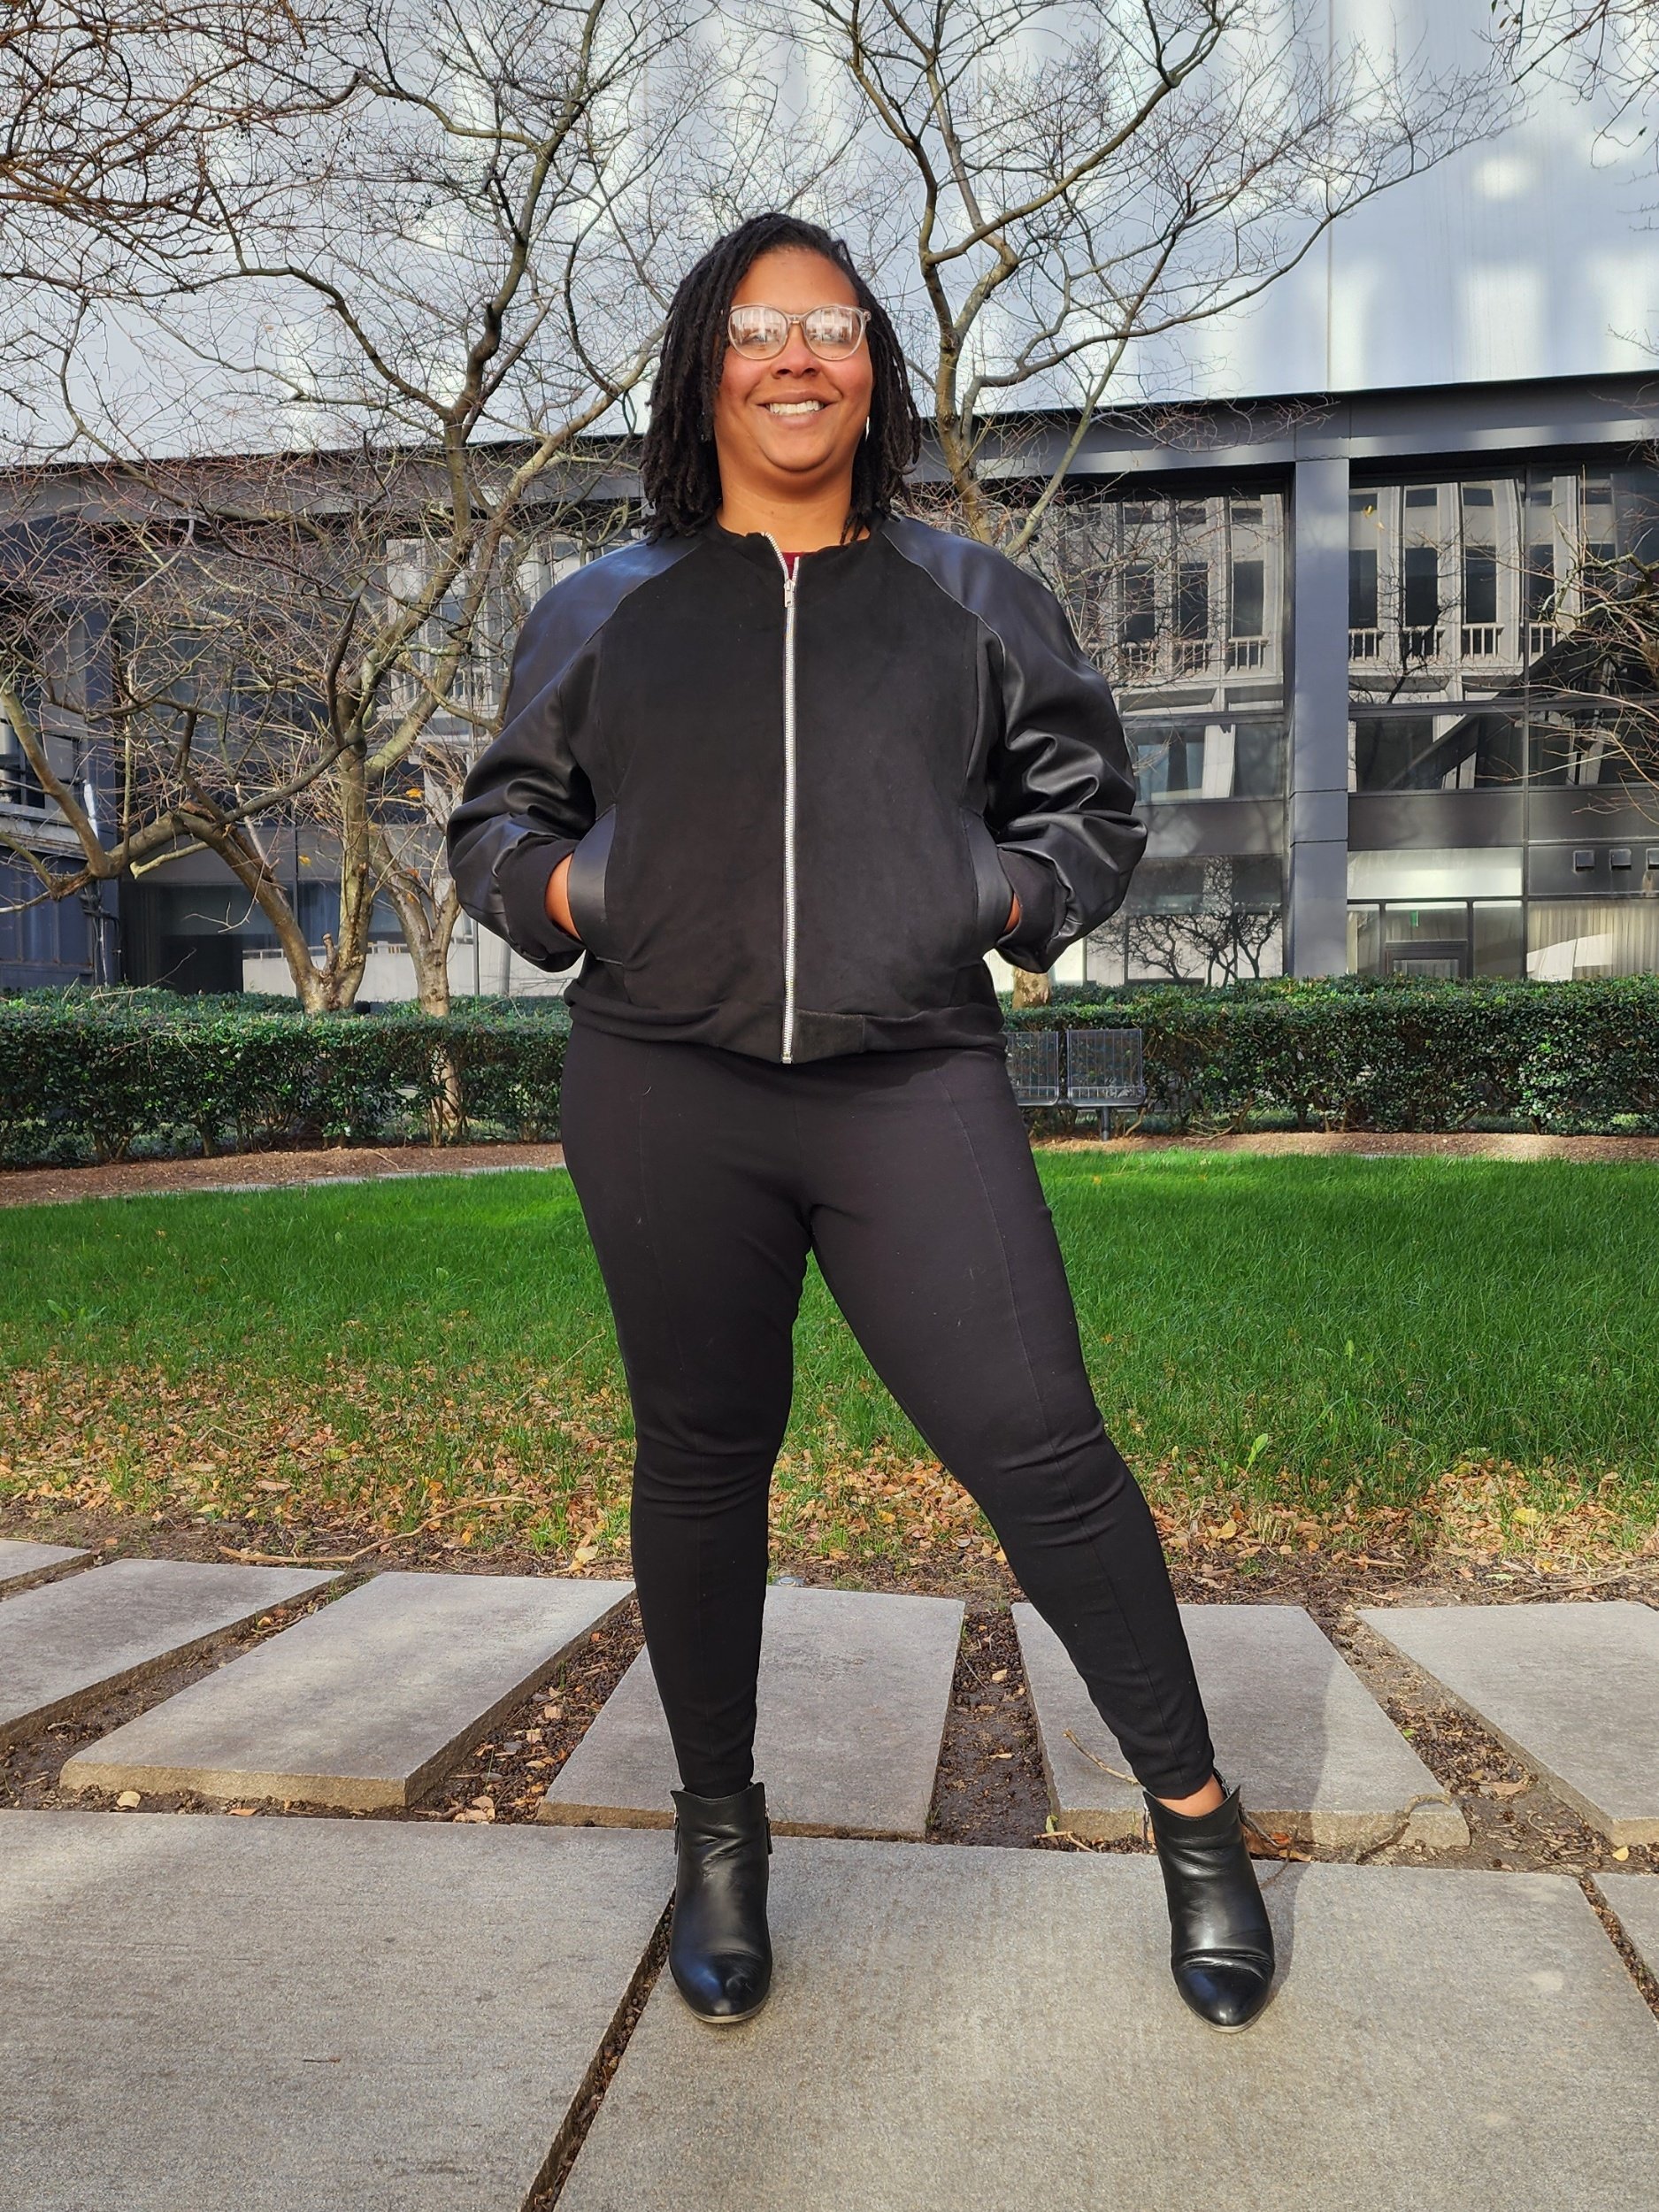
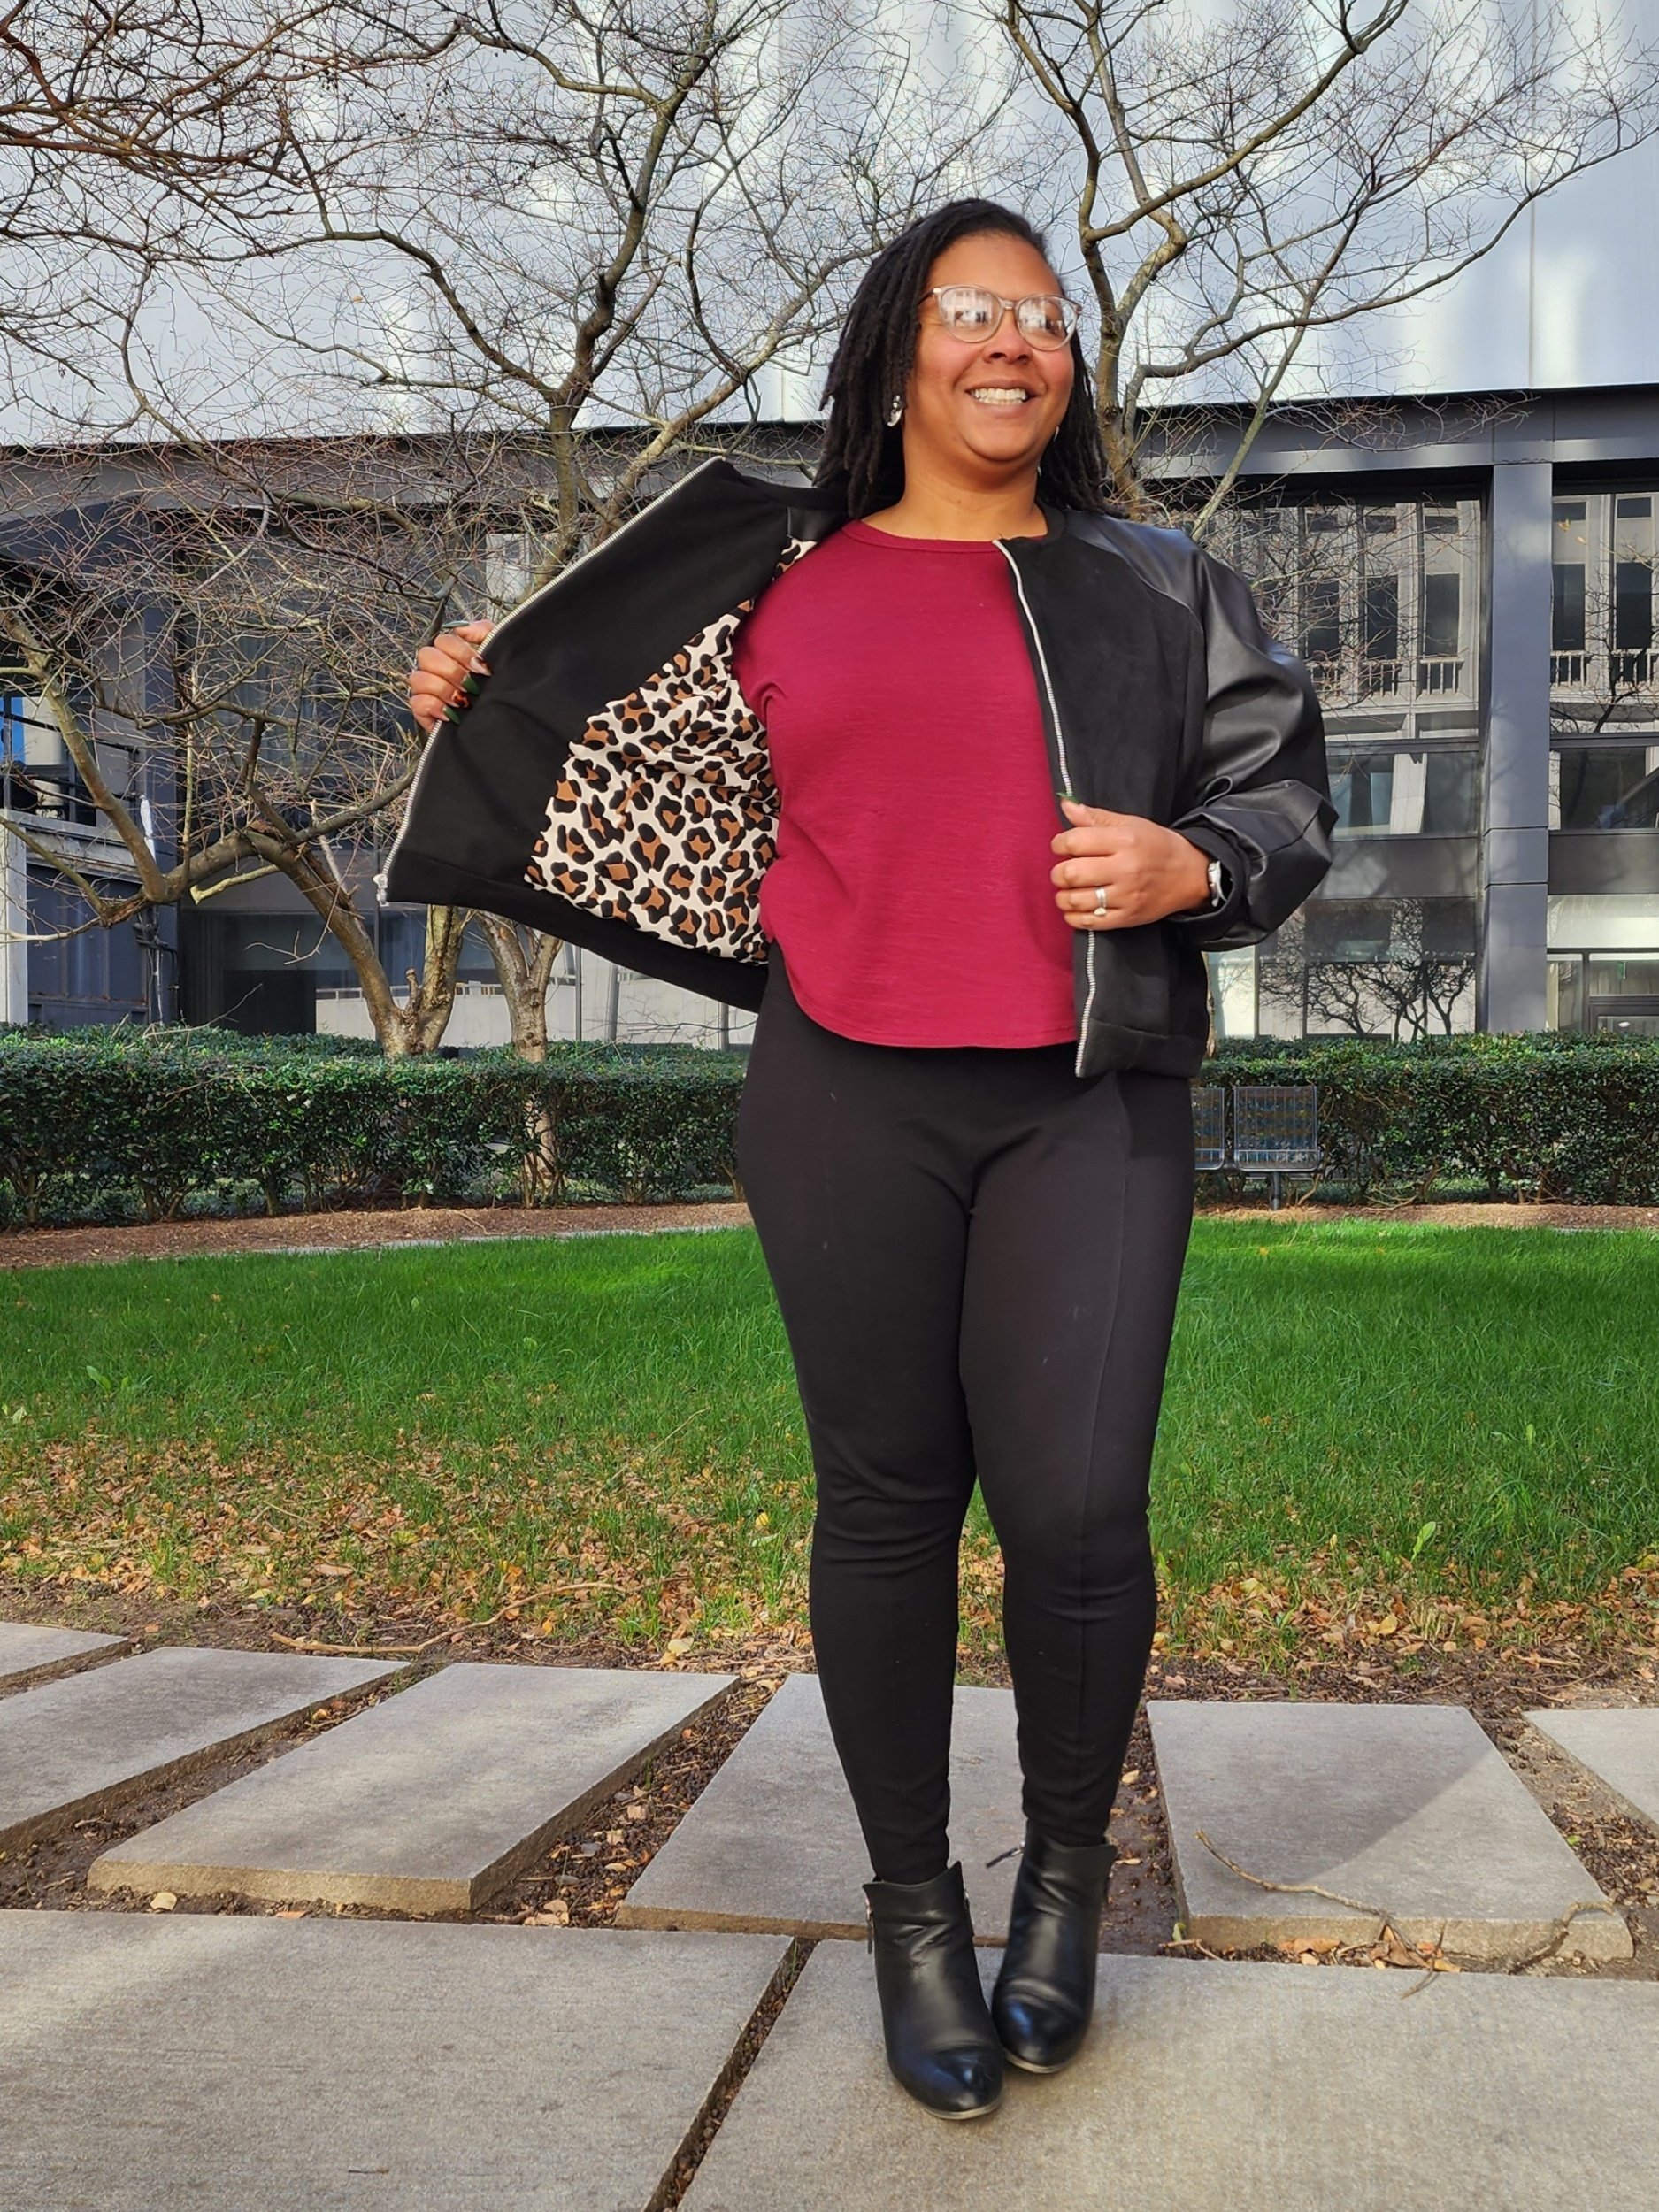
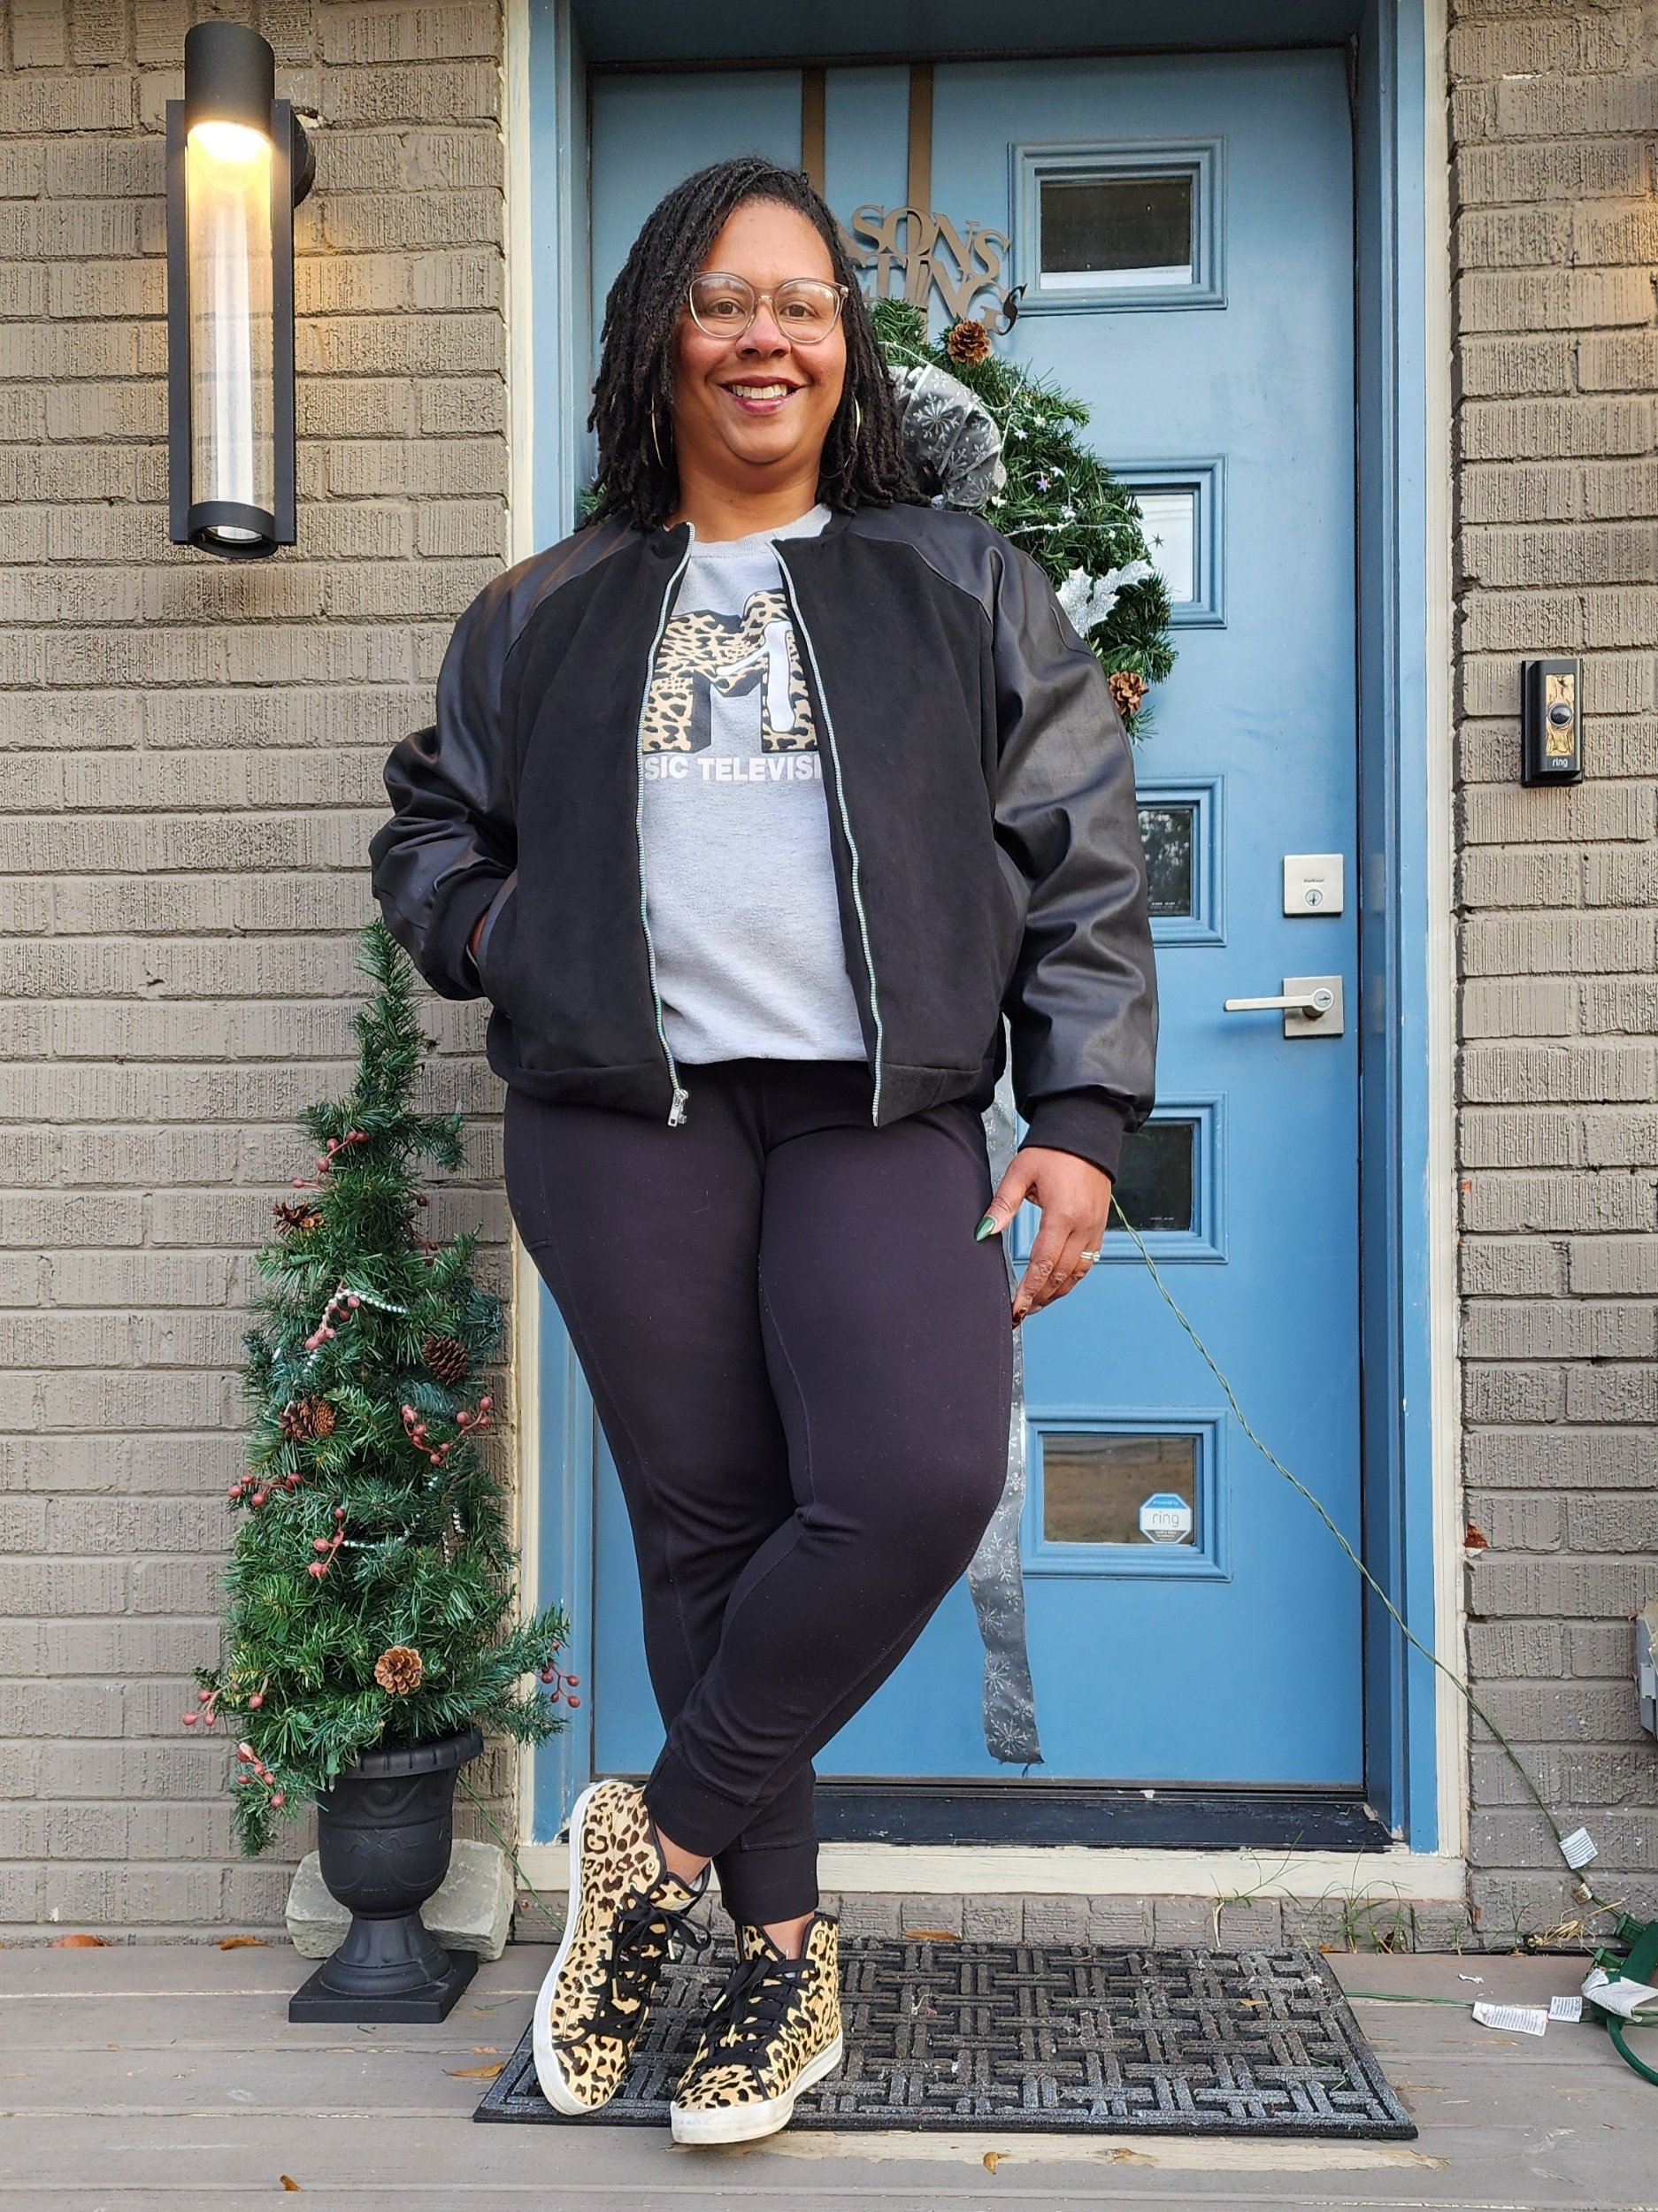
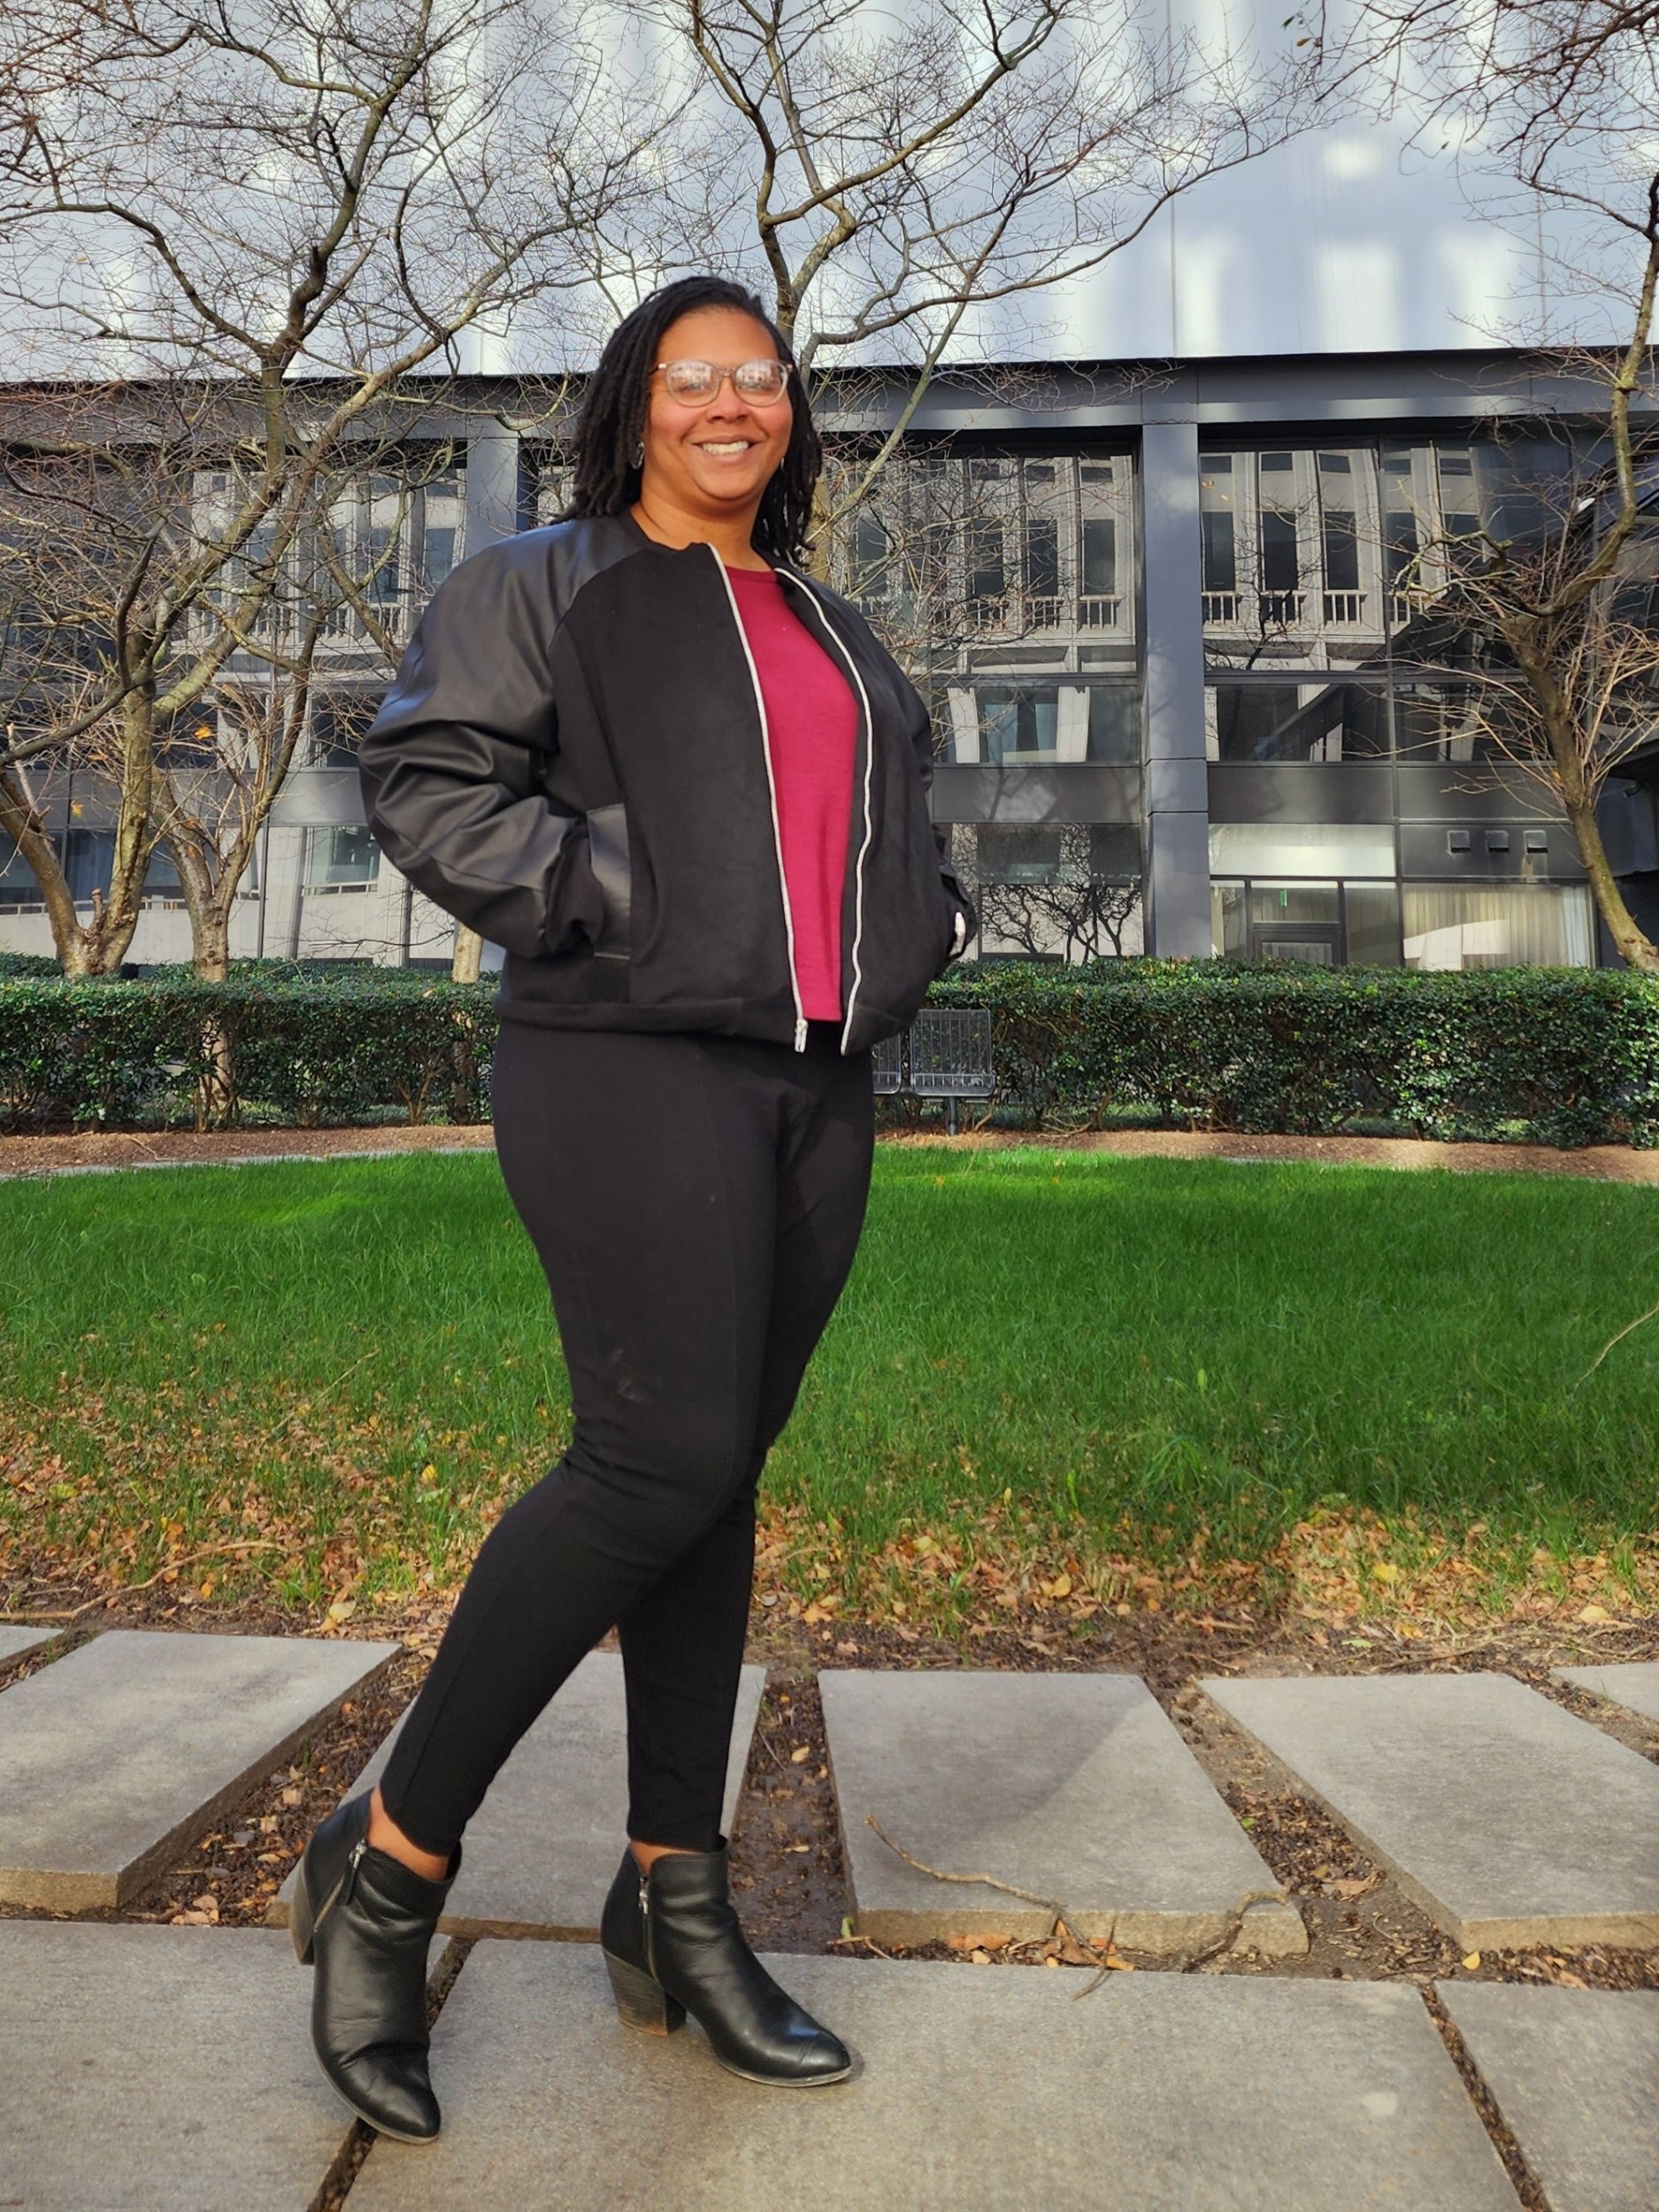
The black microsuede fabric of the body has been in my stash for years, it was given to me by Fabrics.com. I’ve always wanted to make a moto jacket with it (and I still have plenty to make one), but I realized it would also be great for this bomber. I ended up being heavier in weight that I thought. I wanted a faux leather for the sleeves to play off the faux suede, but I had no luck finding what I wanted locally (well Joann has some but I wasn’t paying for) so I went with this coated denim that had a leather-ish look for $7.99/yd from Fabric Joint. I had planned on using the heavy rib knit from Fabric Mart (in the pic above) for the cuffs and neckband, but it and the microsuede were too thick, so swapped it to a lighter rib knit.
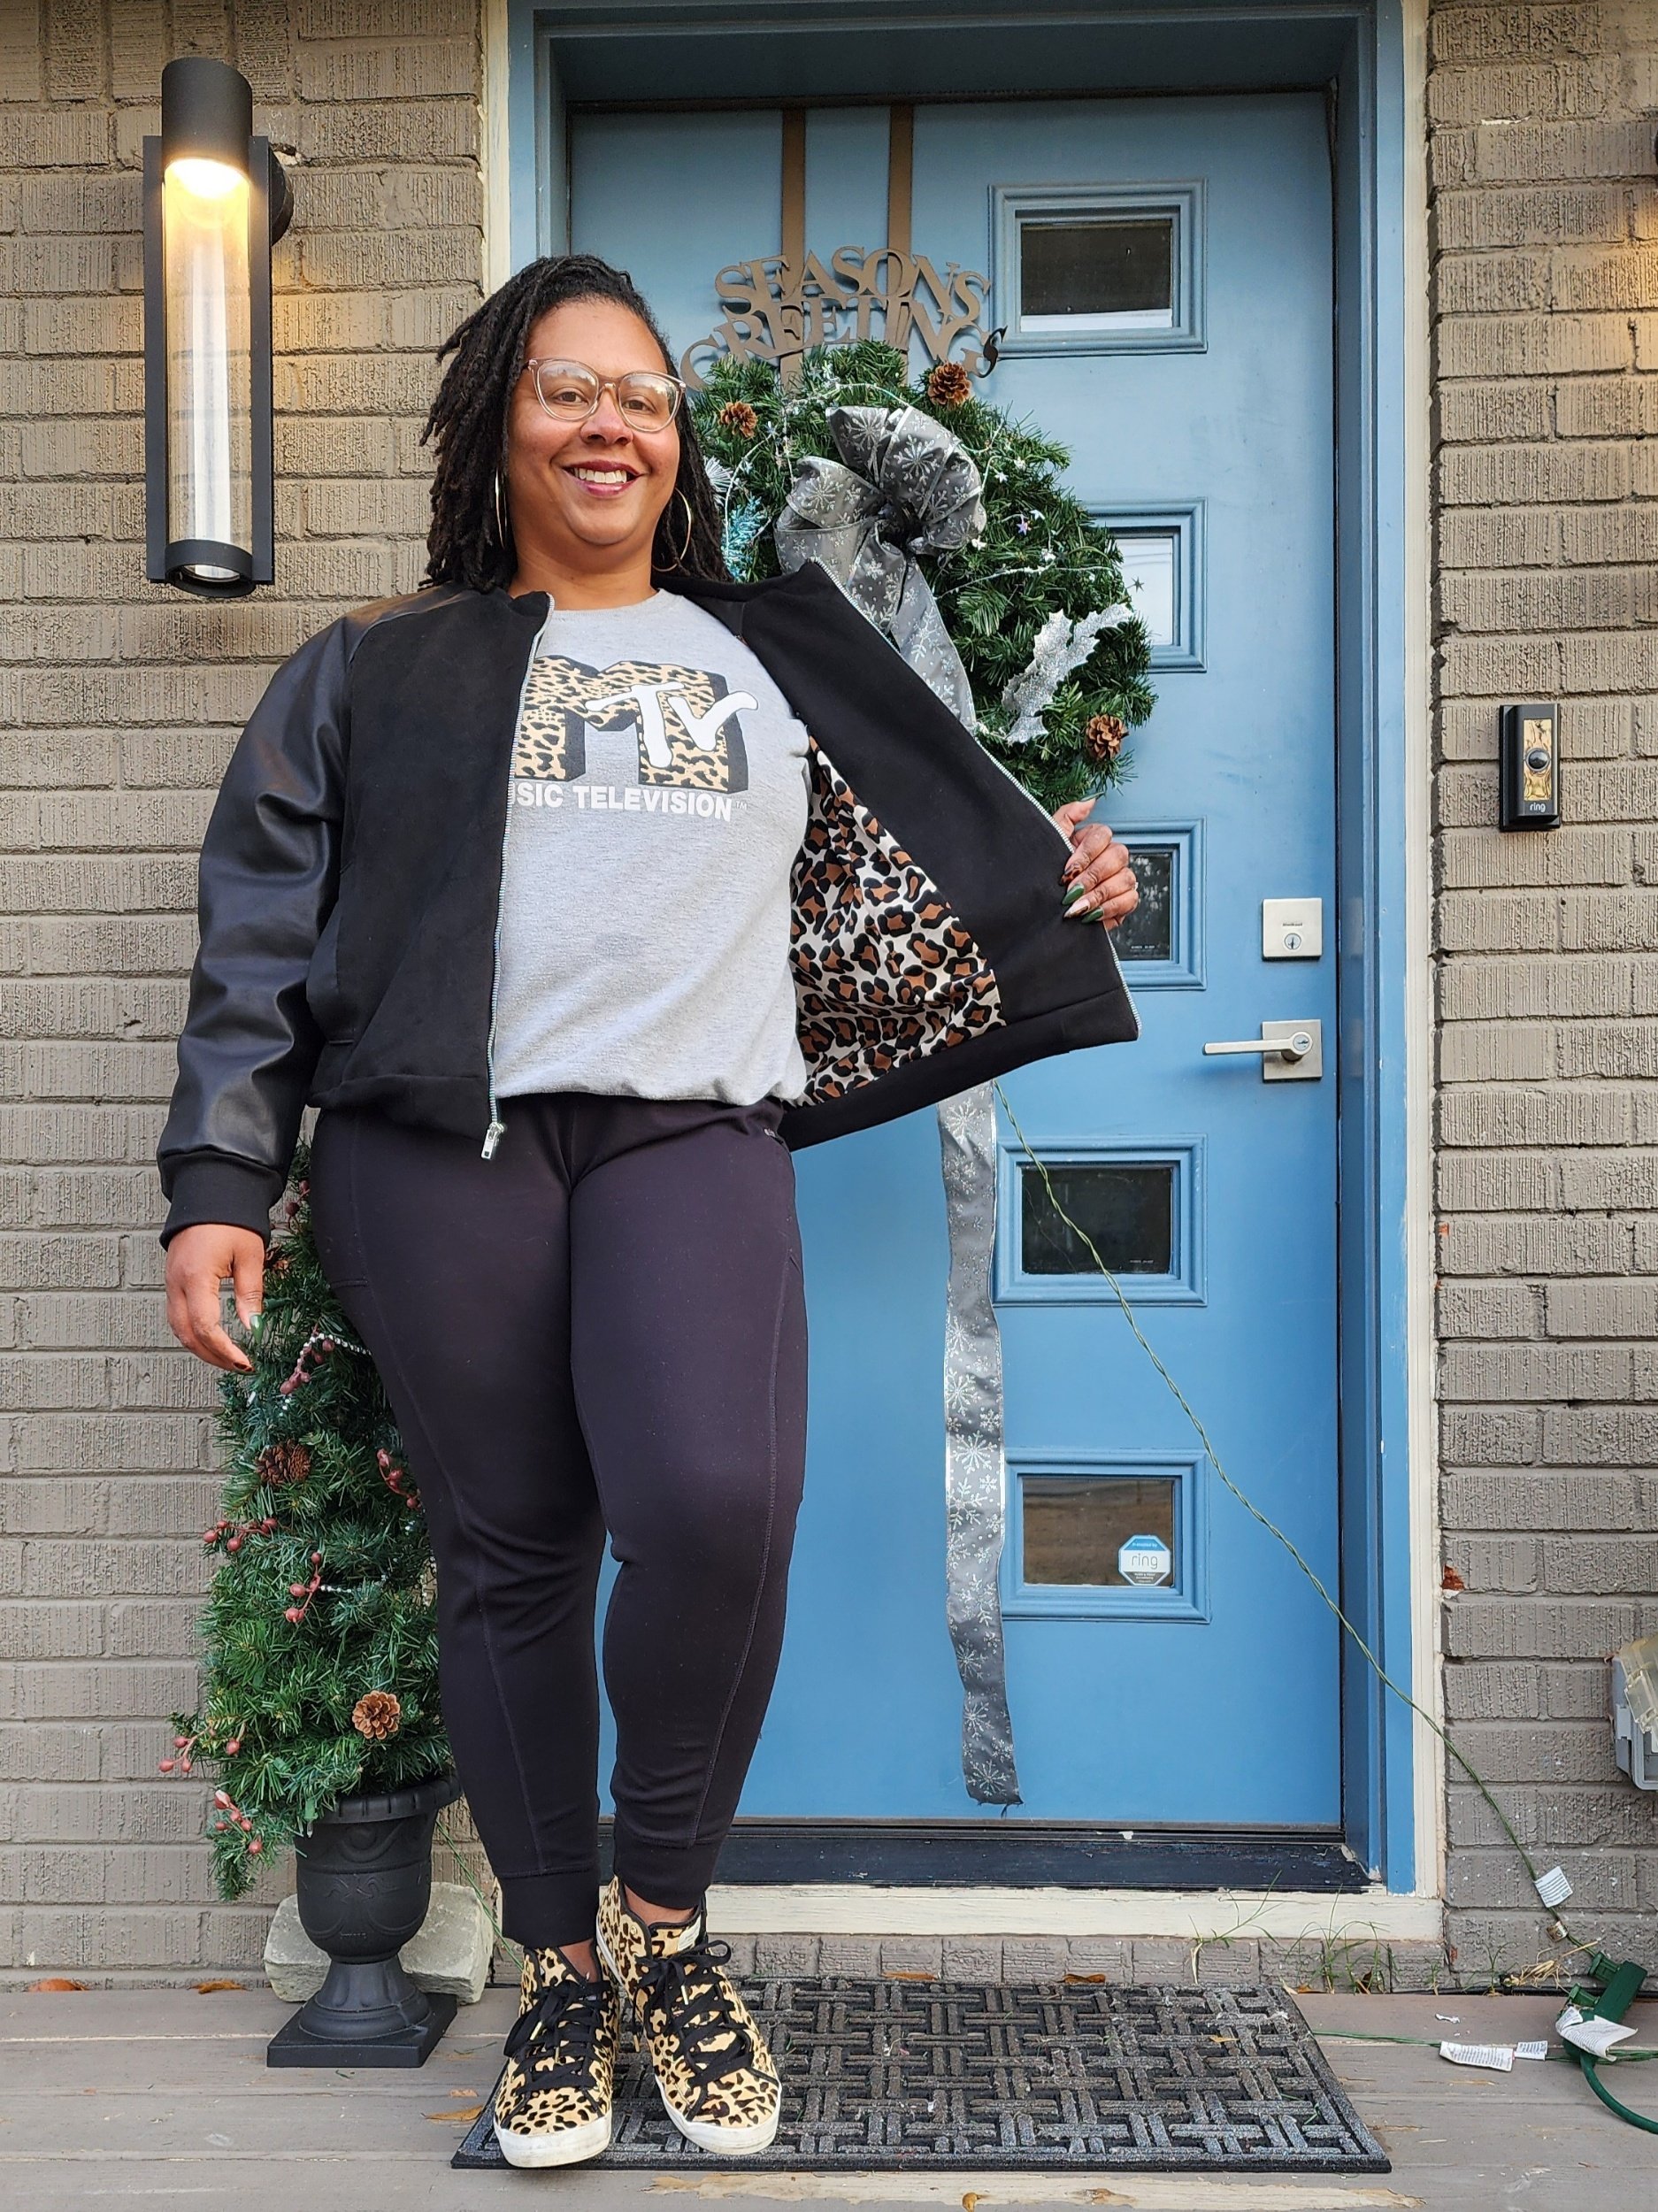
I actually had the hardest time deciding on the lining because for a solid black jacket I wanted something fun, but I didn’t know if I wanted a fun print or a bold solid. While at Fabric Joint my daughter spotted this leopard slinky print fabric that was just $3.99/yd. I think it works great with this jacket and you’ll be seeing more of it because I purchased several yards.

Modifications:
Quite a few modifications were necessary to take this mid thigh length coat to a bomber jacket. Lets go over those.
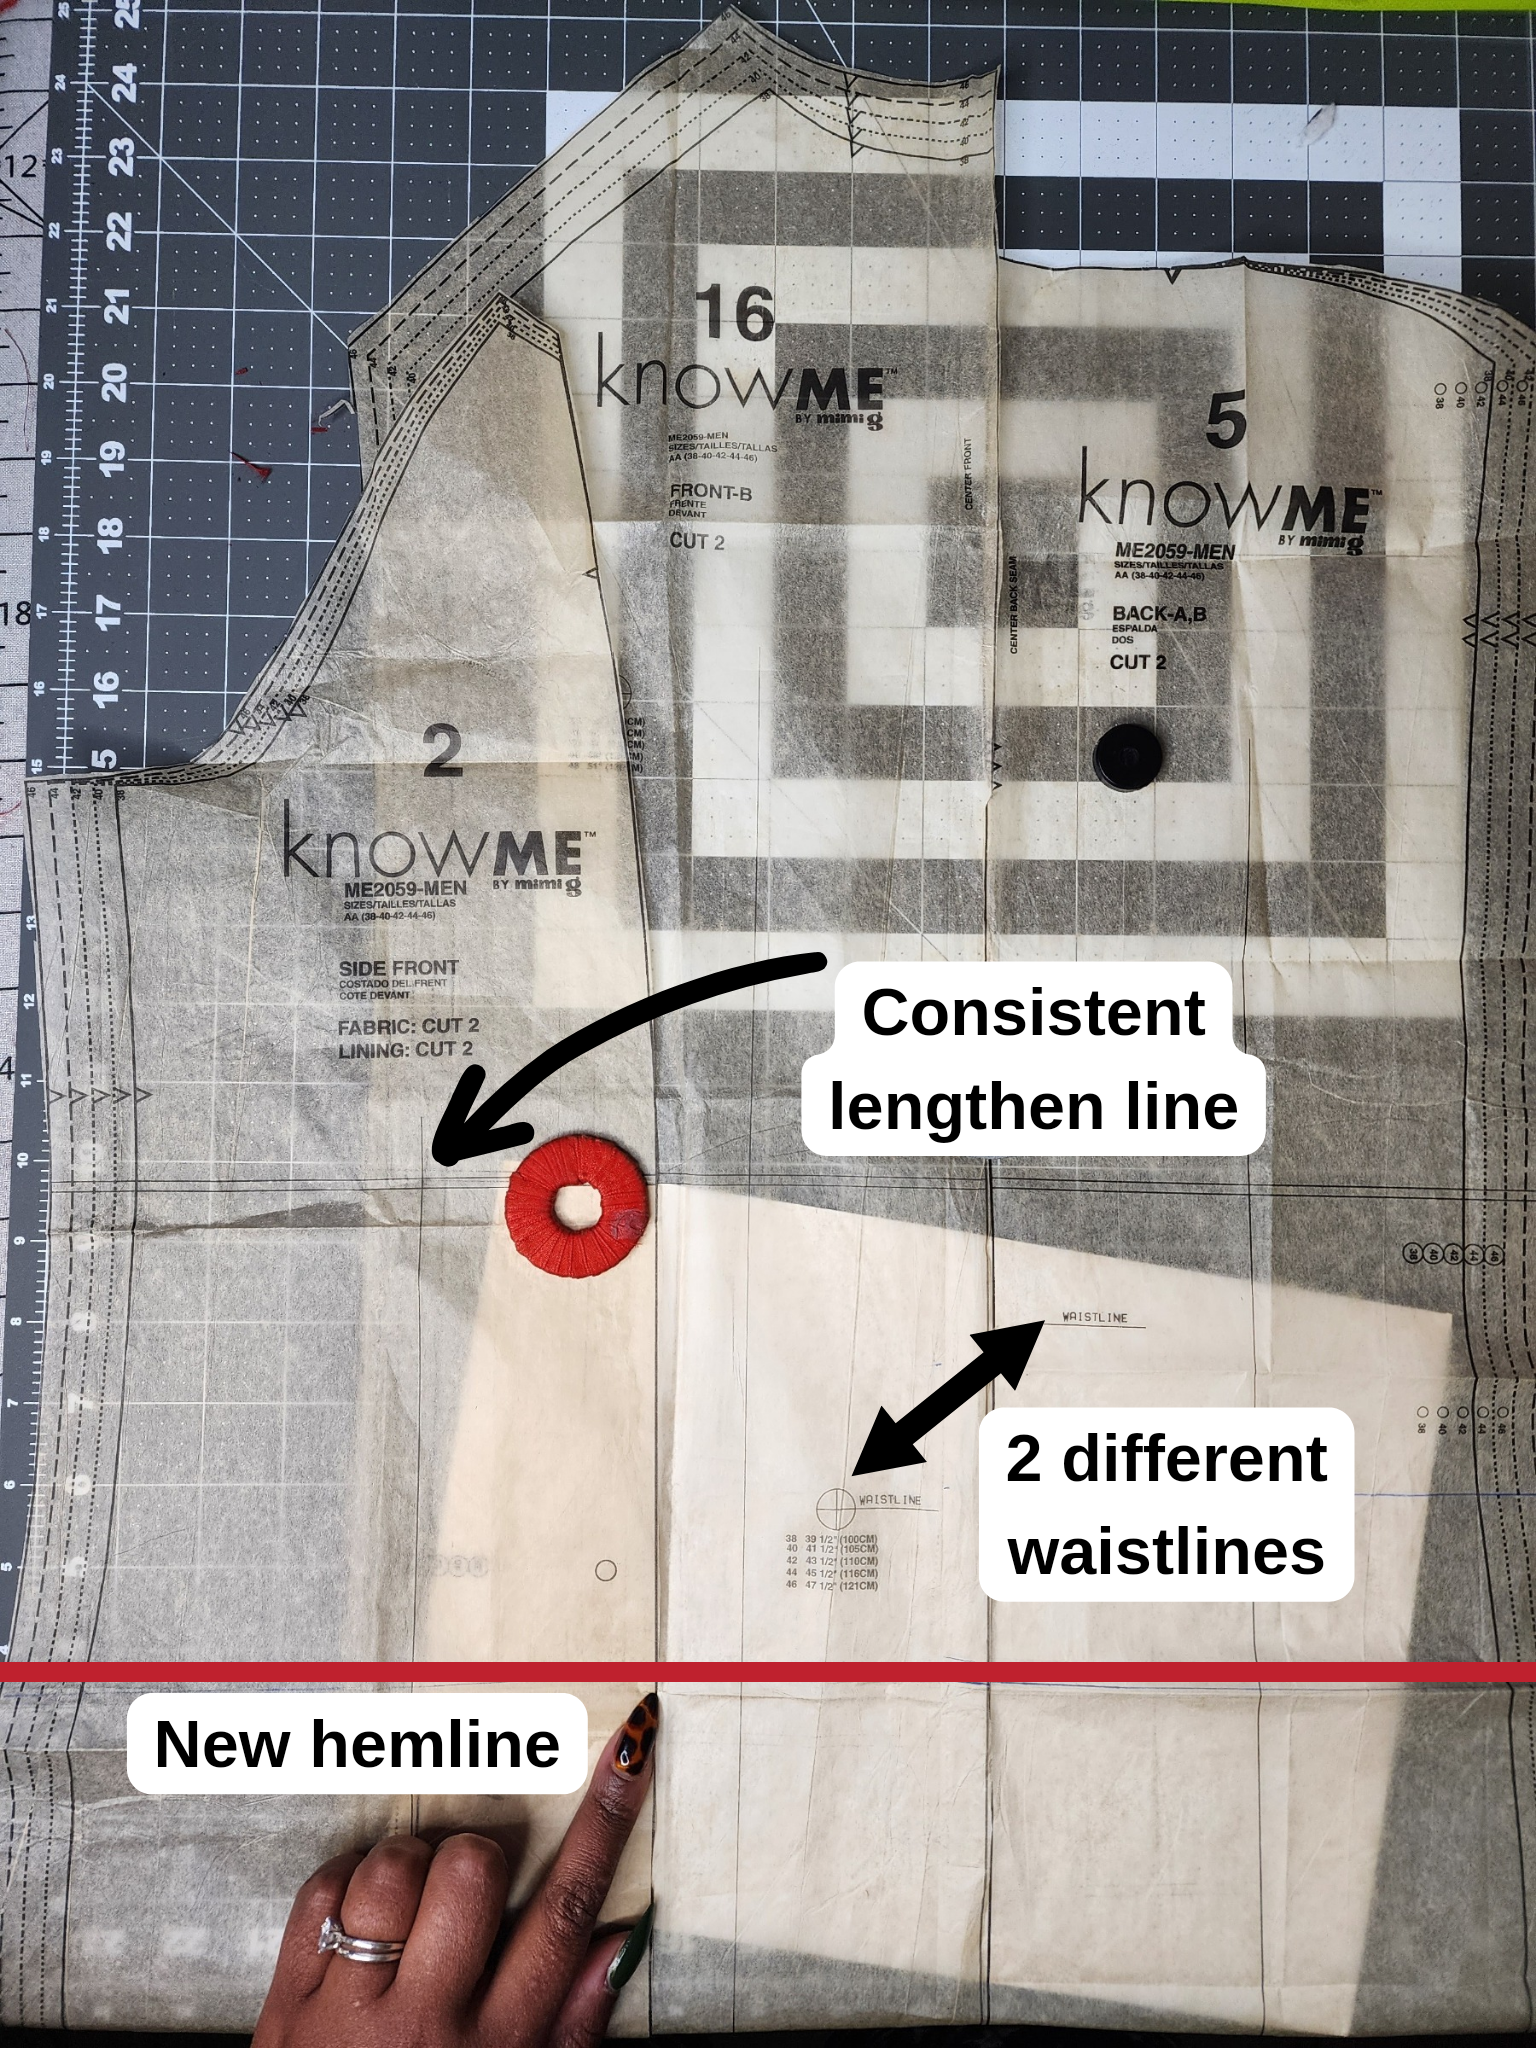
The most obvious change is the length. I moved the hemline to 2 inches below the waist. If you want to try this hack be careful as the waist line marking is incorrect on the back and left & right back lining pattern pieces. You can either “walk the pattern” by lining up the notches and dots to transfer your new cut line OR just mark 6” below the lengthen/shorten line.
Shortening the body requires altering the pockets. The placement needs to be raised and the pocket bag needs to be adjusted. I used a totally different shaped pocket as a base, it was from Simplicity 9450. I enlarged the size as much as I could while keeping the flat bottom shape. I raised the pocket opening by placing the pocket bag along the front and side front pieces lining up the bottoms, then I marked the opening with dots.
I shortened the sleeves by 4 -1/2” because I would be adding a cuff. This which was too much, I think I thought the sleeves hung longer than they do. I think the next time I wouldn’t shortened them at all for a baggier fit, but if I did I wouldn’t do more than 2”.

I wanted 2” cuffs and hem bands so I cut strips 5” tall. For the cuff length I just used my wrist as a guide and for the hem I measured the length of the raw hem of the jacket and subtracted about 6”. For the hem squares (where the zipper meets the ribbing) I used a 5” x 5” square that I attached to each side of the hem ribbing before attaching to the hemline and then added the zipper.
I went back and forth on the collar, did I want the collar stand just in a rib, a narrow collar, no collar or a even a hood? After creating facing pieces during the live to omit the collar together I decided at least a narrow collar was needed. I simply cut another length of rib knit, 2.5” wide by 1” less than the length of the neckline and install it similar to the stand collar.
Lessons Learned:
I shortened the sleeves too much. I wouldn’t shortened them again.

Summary:
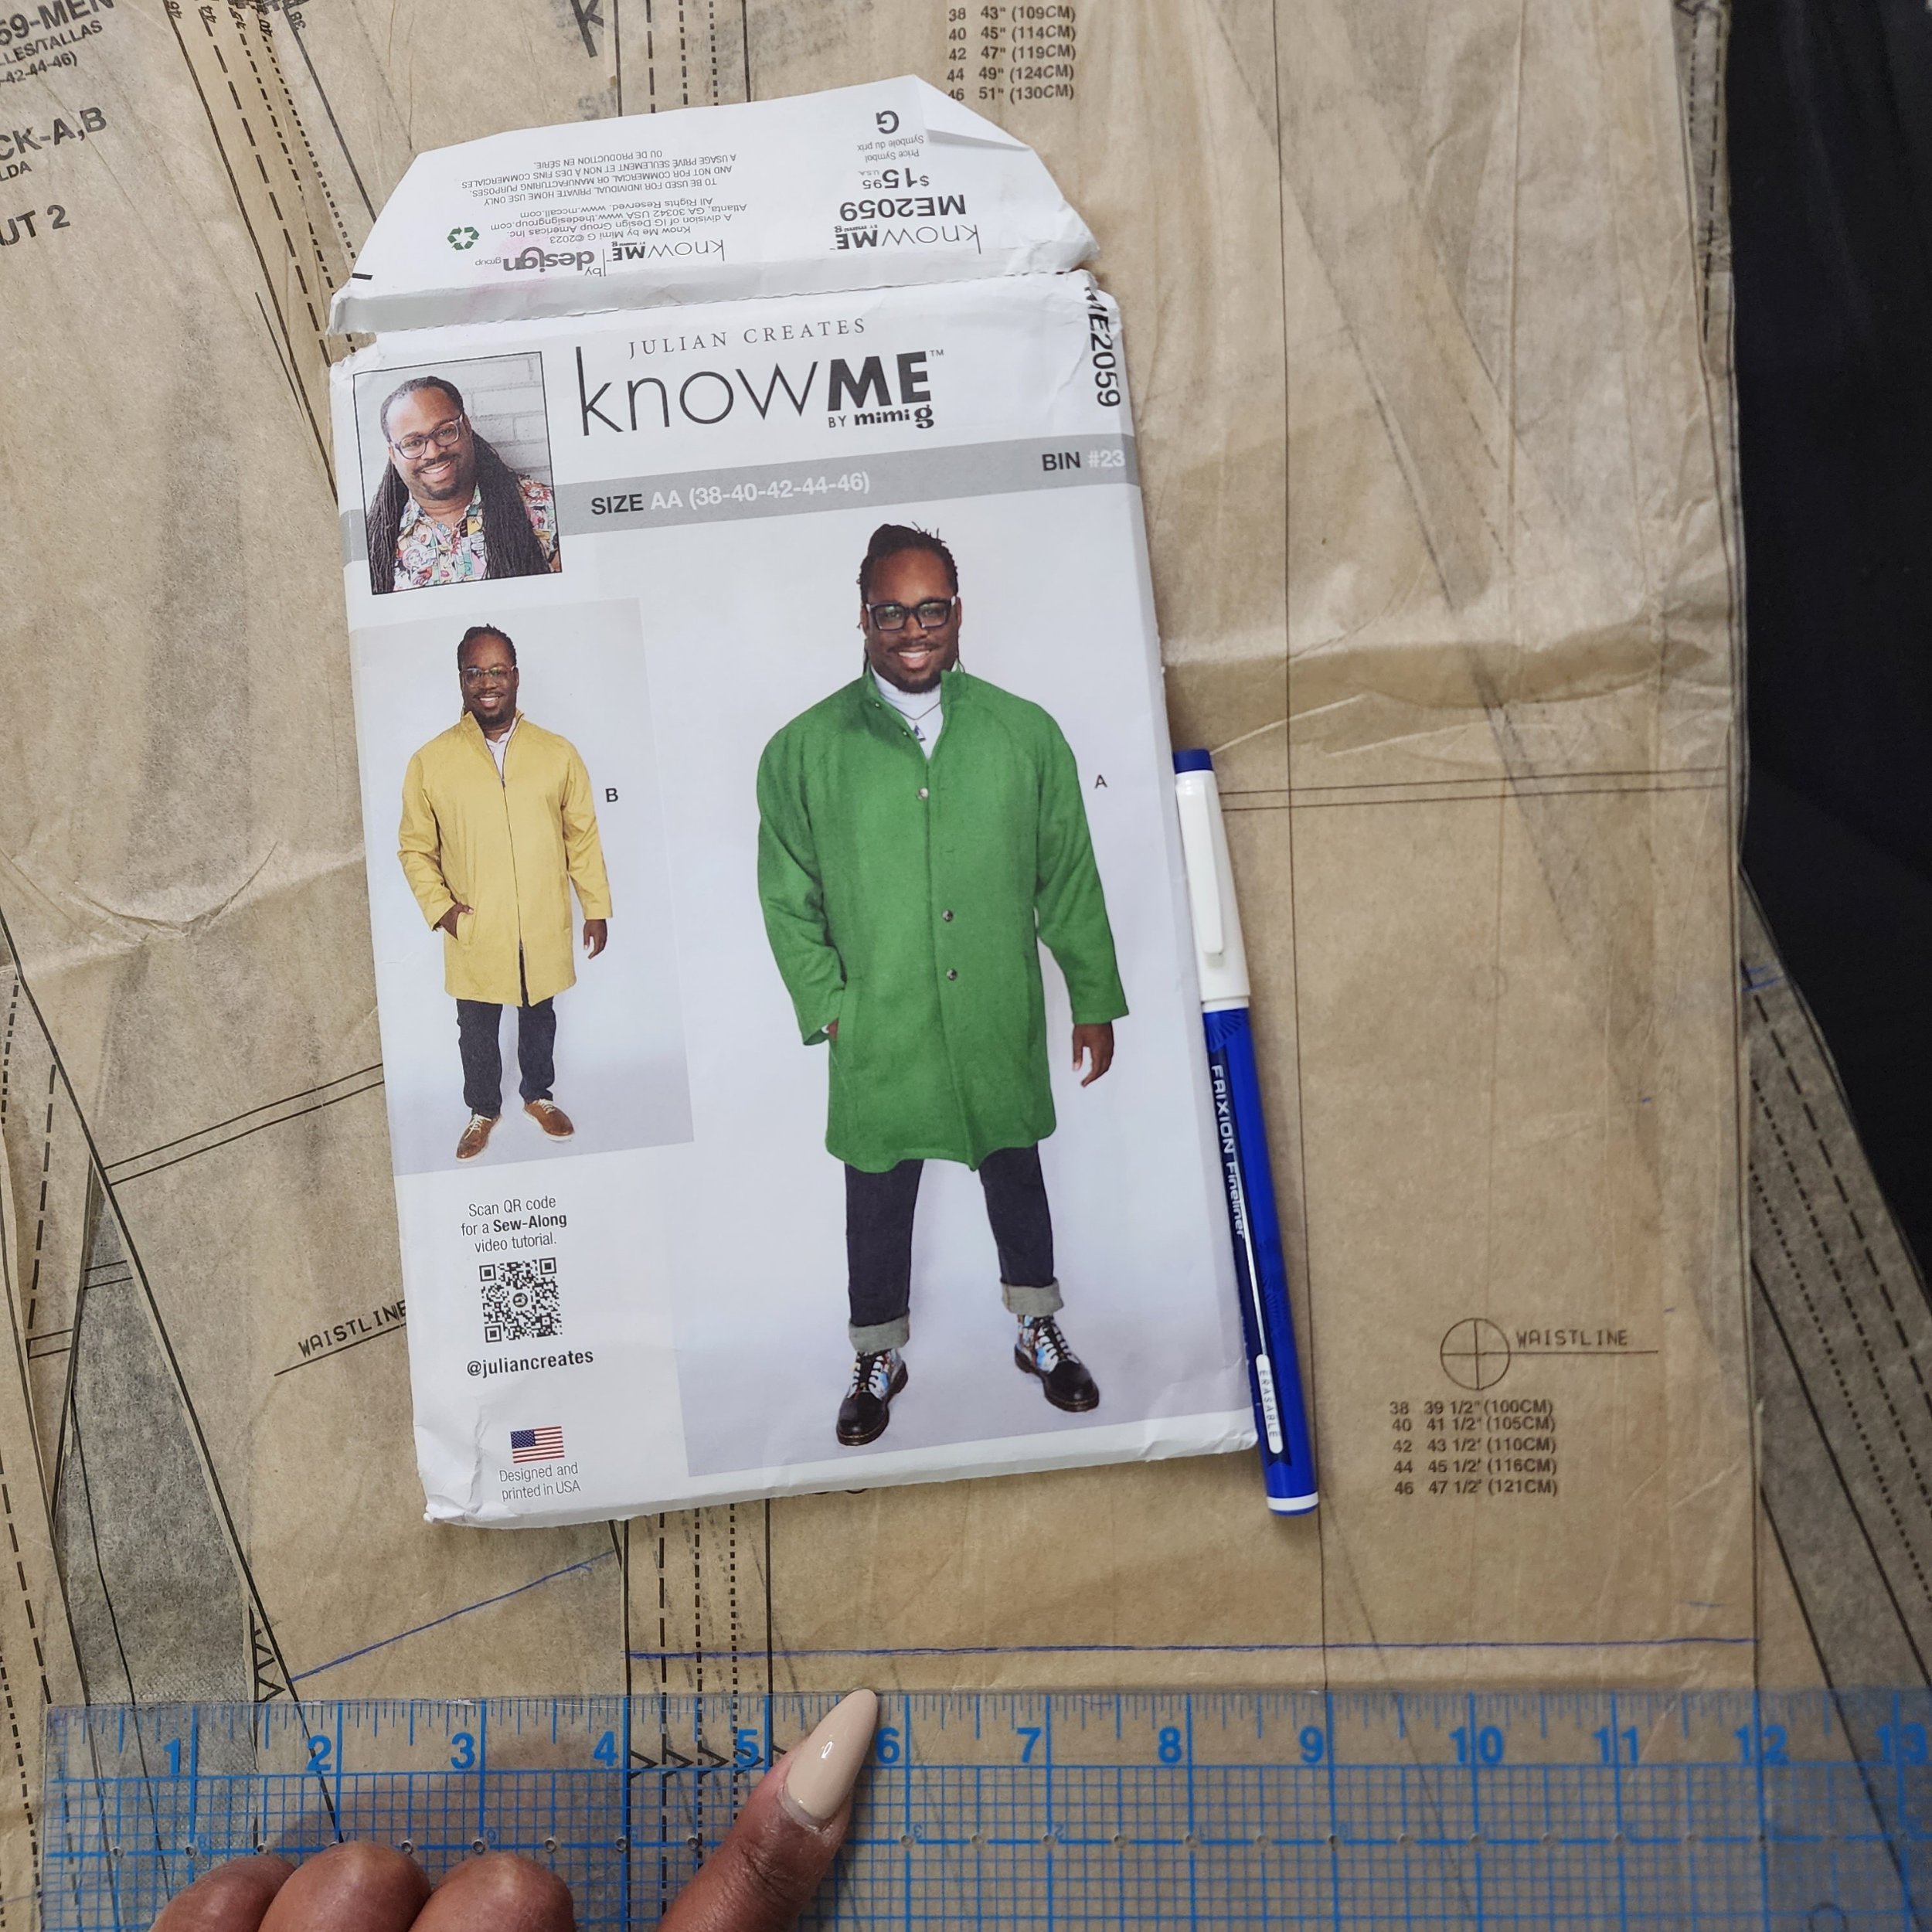
Pattern: Know Me 2059
Pattern Description: Lined car coat with saddle shoulder, stand collar, welt pockets and back vent can be made either button down or with a zipper closure.
Sizing: 38-46, 48-56 I sewed a a 44
Does it look like the photo/drawing on the pattern envelope? No, but I modified it quite a bit.
Were the instructions easy to follow: Yes, but I sewed it live with Julian -the designer- so he did the construction differently.
Would I recommend it to others? Yes definitely