
Twist Front Top: New Look 6303

 First let me just say “I LOVE this shirt!”. This is my final garment for the Suduko Wardrobe Challenge (I still have 3 accessories to share). This square was a toss us until the very end. I have so many top patterns that I’ve never sewn so it was hard to pick one last one for the contest. The only limiting factor was my fabric stash as I was determined to not to buy more fabric for this contest. Honestly since this top only has to be paired with black pants and jeans even picking from the stash didn’t narrow things down much.
 I ultimately decided that I wanted to use this “paint splatter” fabric that I purchased from a local store at least a year (maybe 2) ago. Though it doesn’t match the floral Asian inspiration fabric it pulls for the similar color palate with the white background and turquoise, purple and black accents. I knew this would work great with my black skinny pants and jeans as well as the other accessories in my grid.
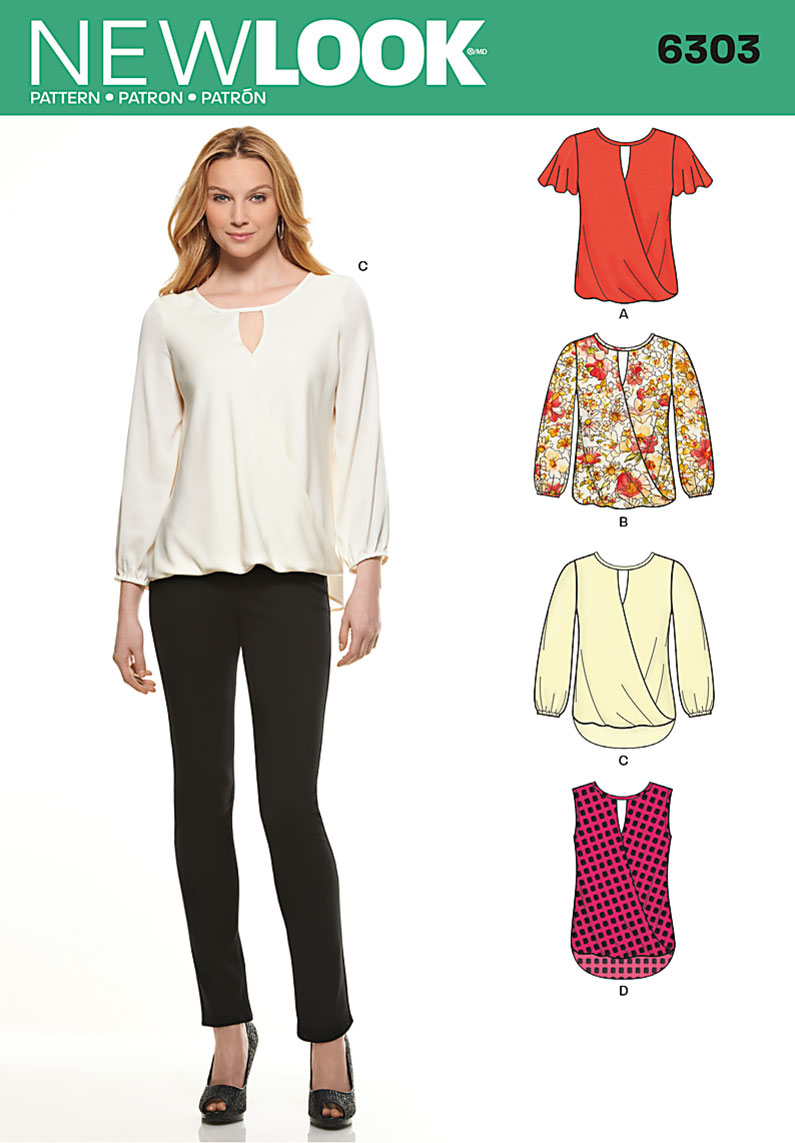 I had a little over two yards of this fabric, which I believe is a polyester crepe, in my stash which helped to narrow down my pattern options. Made the short list but I decided on New Look 6303. This pattern has been in my stash for at least a year. I bought it because this twist front shirt was all the rage in RTW and I refused to buy one because I knew I could make it. If you’re like me you know how that goes, you have so many “to sews” that a few (or several) ideas get pushed back and back again as season change and new patterns come out. Well this shirt was in that pile that kept being put on the back burner, until now…
 This project took me around 4 hours to sew, from cutting the pattern to all but slip stitching the side seams (more on that later). I only know this because I got home late (around 6:30) the evening that I sewed this and thought for sure it would take two days due to my late start. I was surprised to be (almost) done before 11pm. Granted I’m a pretty quick sewist generally, but this was even good for me. View D is only three pieces the front piece-cut on double thickness, the neck band- cut once and the back-cut on the fold. You also need about ½ yd single bias tape to finish the armholes.
 Construction was simple. Pleat the back piece, stitch the front pieces together RSF, turn front piece right sides out, fold and twist front and attach shoulder seams. After that you just need to add the neck band, hem the back piece and attach the side seams. For the side seams you could simply baste the front sides (as instructed) and attach as one piece to the back side seam. However, I chose to make that seam “cleaner” by sandwiching the back side seam in between the front side pieces leaving a small hole open to turn the shirt back to the right side, I slip stitched the opening.
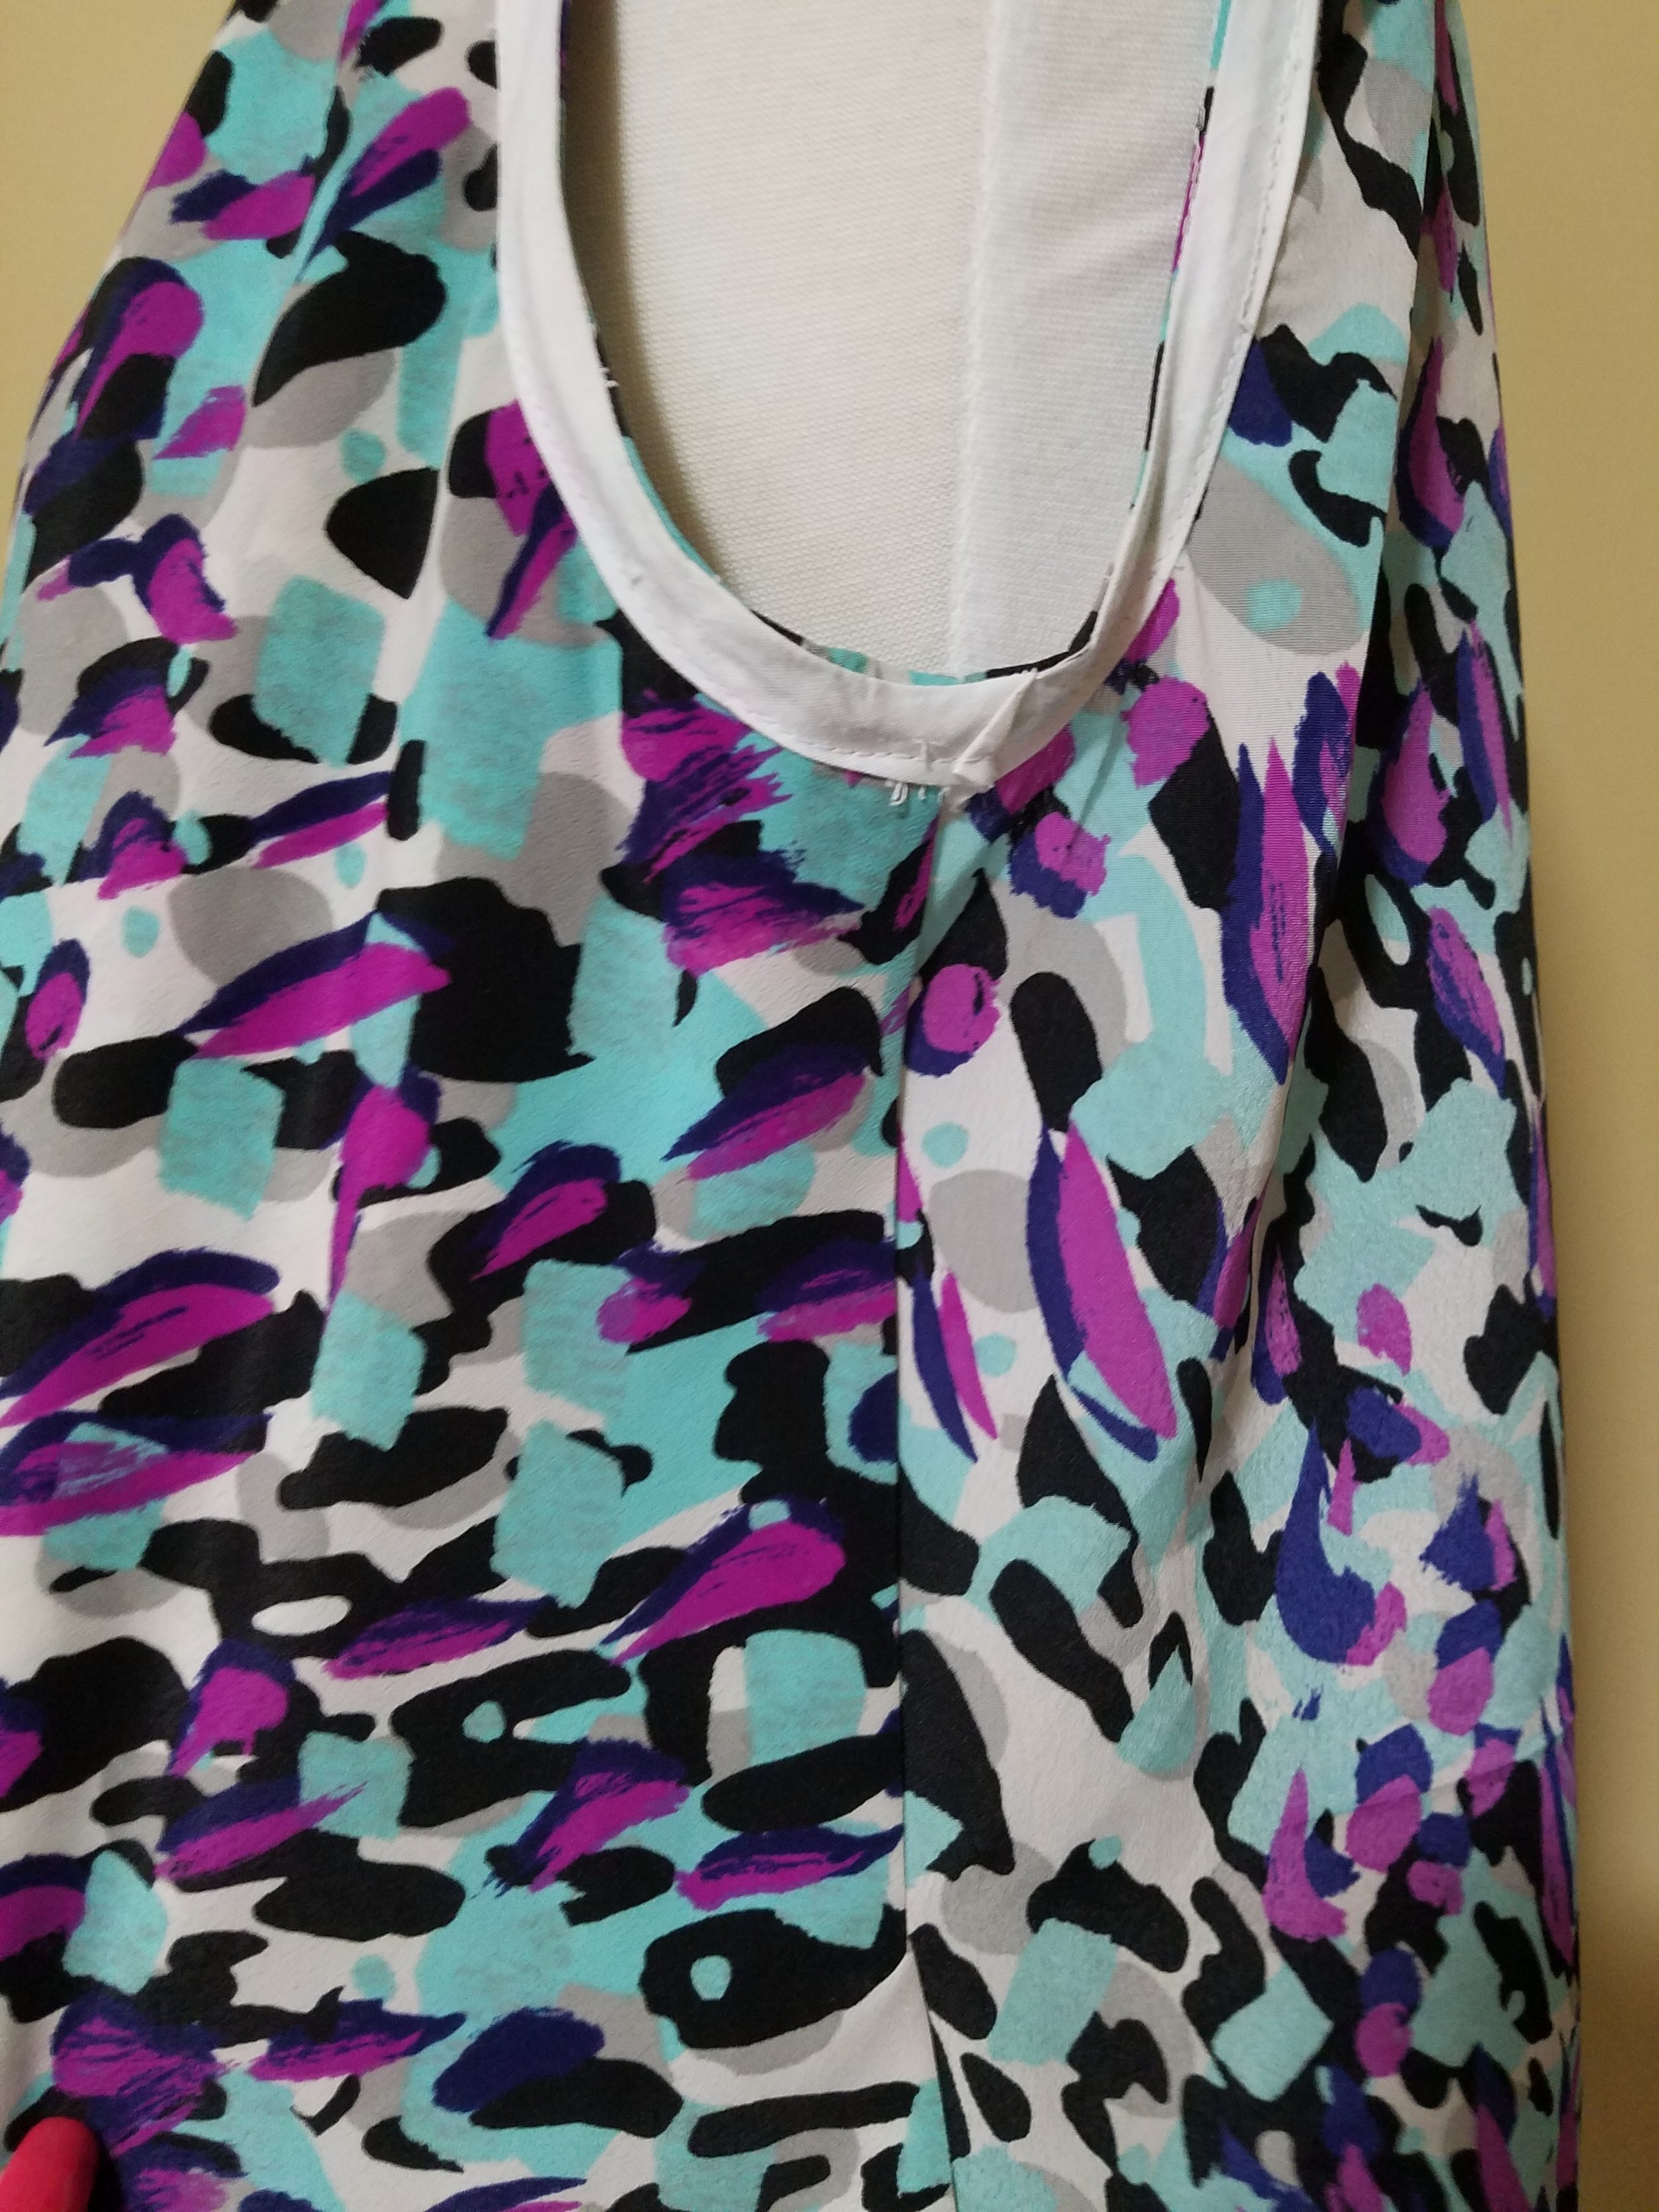 I tried to photograph this but it wasn’t the easiest thing to capture. I actually think it would be easiest to hem the back first then attach the sides then the shoulder then the neckband. Warning I didn’t try this so maybe I’m overlooking something. I will try it this way next time (because I will make it again soon) and document the process…if it works. I love the result though both the outside and inside seams look finished.
 This pattern did not have fitted measurements, sigh, so I had to take a guess. I went with a size 16 knowing that too big is better than too small, especially since this shirt is hard to “try on” until it’s all been stitched together. Since this is a loose fitting shirt I also decided that a too big top would hopefully just look “full” where as a too small shirt always looks “tight”. I am a 38” bust and I feel that the 16 works well, I do think a 14 would have worked as well as I have adequate room in the armhole and through the bust. The neckband is a little small, not a struggle to get into but certainly not roomy. I will cut a 14 next time for comparison and I would definitely cut a 14 if I used a knit (like an interlock, ITY or matte jersey).
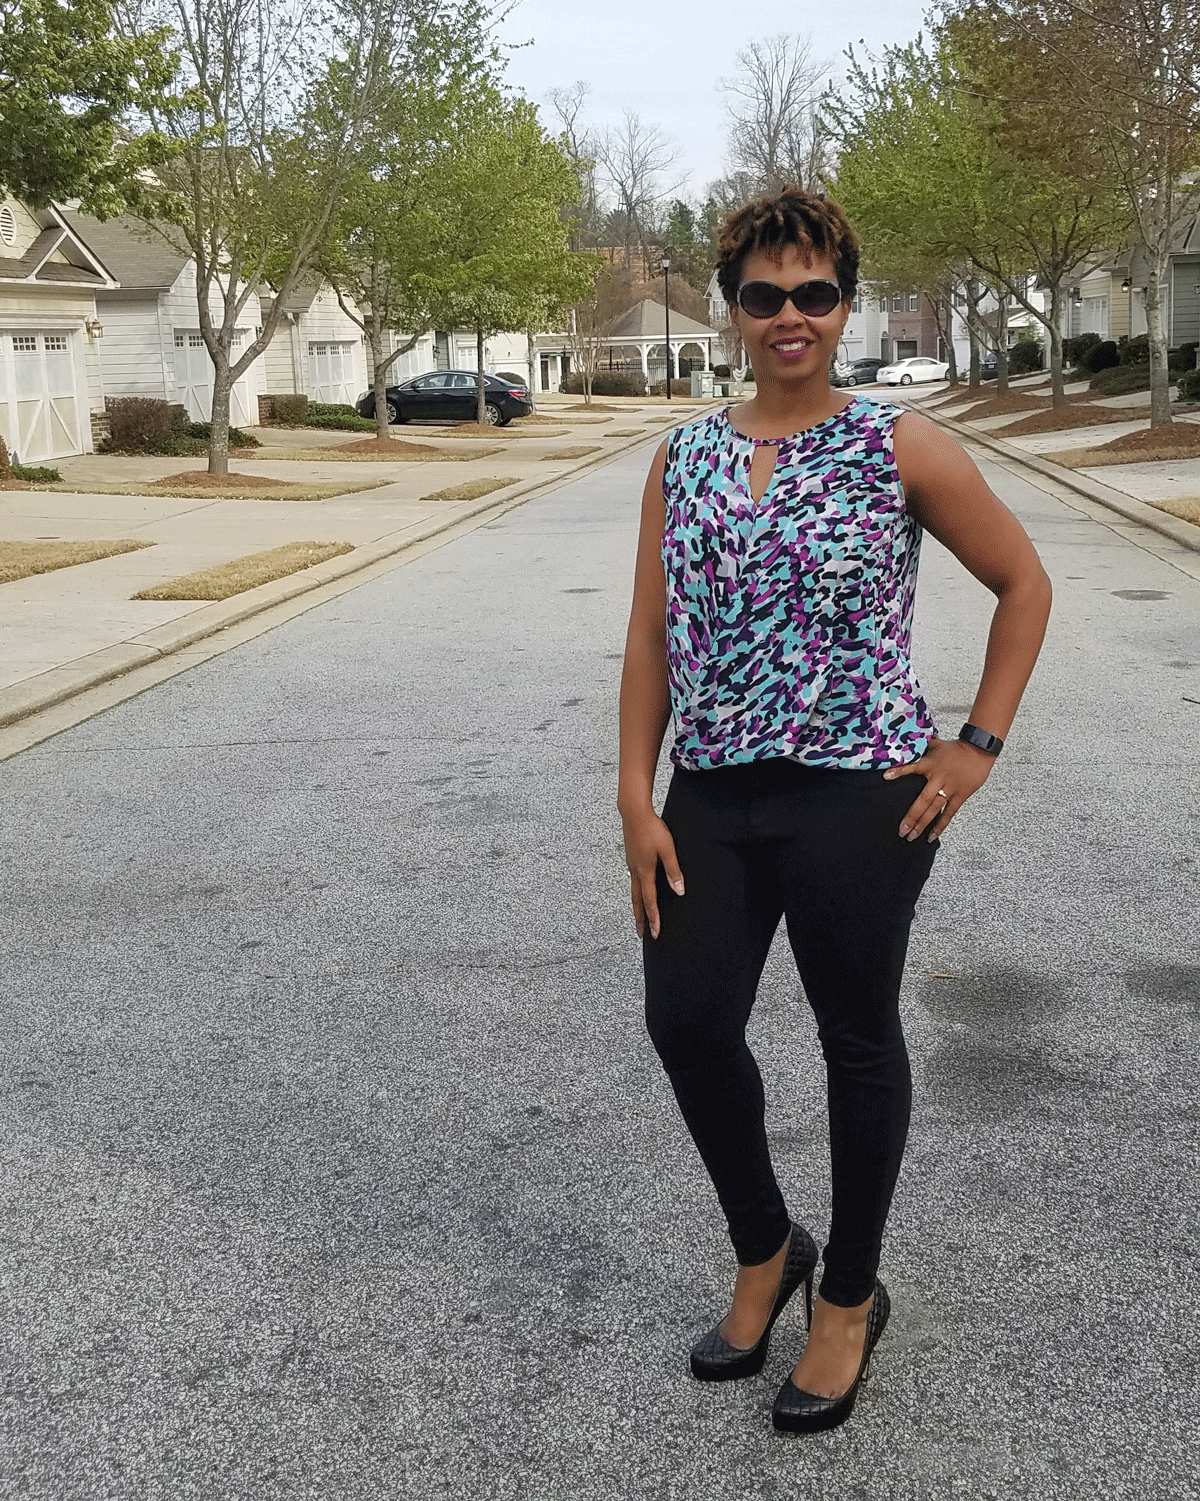 That’s really all there is too it, I think I could make a shirt in just 2 hrs or so from cutting the fabric to slip stitching now that I have the pattern cut out. I love this shirt it is a good length to wear with pants or leggings, the twist front is appealing and the fullness is figure flattering. I see many more of these in my future, probably all with the same back view but I’d like to make the sleeve version for this spring or next fall.Pattern: New Look 6303Pattern Description: twist top shirt with sleeve (flutter, elastic, none) and back hem (straight, elastic or shirttail) variations. I sewed View D a sleeveless twist front top with a shirttail back.Sizing: I cut a 16 (38” bust)Difficulty: 2/easy only because of the bias tape and narrow neck hem.Fabric Used: Polyester (?) crepe from a local storeDoes it look like the photo/drawing on the pattern envelope? YesWere the instructions easy to follow? Yes, though I veered from them.Likes: twist front, quick sew, minimal pattern pieces, casual but chic lookDislikes: nonePattern alterations or any design changes made: I sandwiched the back side piece in between the front side pieces for a cleaner finish.Would I sew it again? Yes, I will also make View C and more View B’sWould I recommend it to others? DefinitelyConclusion: I’m very pleased with the top and the easy, quick construction.