TipStitched Tips - Selecting the Right Pattern Size
Hello my name is Tip and I'm obsessed with sewing. That's why I started this blog, why I follow other sewing bloggers, why I started an online handcrafted clothing store, why I am on the mailing list of at least four fabric stores and why I belong to five or more Facebook sewing groups.In these groups I've seen members often ask about choosing the right size pattern. Some state that they stick to pdf patterns because the sizing of printed commercial patterns scare them. Others state that they thought they had selected the right size only to have their finished garment just hang them like a tent or be too tight to even try on. Hurt feelings often come after a woman who wears a size 10 in RTW (RTW=ready to wear=store bought) look at the pattern sizing and discover they are an size 16. This has come up so often that I finally saved a post once so that the next time I saw a similar question I could just copy and paste my answer instead of having to retype my long diatribe on my cell phone. I've also recently started to get questions via Instagram, Facebook and here on the blog about pattern sizing so I want try and help anyone who is struggling on this issue. Please keep in mind that I am not an expert and not claiming to be, I'm just trying to share the way that makes sense to me. If you know of a better way, want to add something or even disagree please comment below. If you find this helpful please share in with other sewsistas and on social media..Let's jump right in! There are 3 terms I think are necessary to start on understanding how to choose the right pattern. They are:
- Body Measurements/Size Charts: these are the standard measurements Simplicity (which includes New Look and Burda) and McCalls (which includes Vogue, Kwik Sew and Butterick) provide to help you select your pattern size based on your measurements. These measurements on found on the back of pattern
- Finished Measurements: these can sometimes be found on the back of the envelope or the website (for McCalls) but is almost always on the pattern tissue. Sometimes though they aren't provided. These measurements reflect the finished measurement of the actually garment for that size. In other words if you could take a tape measure and measure the inside of your garment at the bust, hip or waist and measure this is the number you would get. A finished measurement is your actual body measurement +/- the ease.
- Ease: ease is a sewing term that means the difference between your actual measurements and the finished measurements. There are two types
- Wearing Ease- essentially it is the "wiggle room" that is built into a pattern so you can walk, breath, sneeze, laugh, and eat *note wiggle room is typically not needed in knits as knit fabric can stretch with you.
- Design ease – additional ease to achieve a particular look. A fitted pencil skirt has less ease that a flowy circle skirt.
So to recap ease is the “extra” room built into a garment for wearablity and/or design and finished measurements are the measurement of the finished garment which is equal to the body measurement plus the ease. Right about now you are saying “So Frougie, this is all great info but how does this help me to select the right size?” I hear you Kanye, let me finish.For those of you who go by the size charts based on your body measurements I’m guessing that your garments end up to big. Am I right? I’m going to assume I am. Do you want to know why? I’m going to assume you do. Your garment ended up to big because the Big 4 commercial pattern companies usually allow for a ton of ease. I believe the logic is to err on the side of too large because it can always be taken in - or - an outdated belief that sewists are older women who don’t want clothes that fit their bodies. I will admit I often like my clothing to be on the verge of “snug” but sometimes the ease on patterns is overkill. Four inches of ease in the bust only works if you are going for a tent look, like a tunic or trapeze dress.Below is McCall Pattern Company's Misses' ease chart that indicates the amount of ease built typically built in based on the description of the pattern. Here is the link. I didn't not find a similar chart on Simplicity's site.
 This is why I decide how much ease I want to achieve the fit I desire and then select my size by the finished measurements. As a general rule I ignore the size charts all together. But how do you know how much ease you need? Great question! Keep reading.I’m going to start with knits, because honestly I feel knits are easier. They are certainly more forgiving in terms of fit because knits stretch which means your fit doesn’t have to be as precise. Some newbie sewists find knits harder to work with as they can stretch while sewing and thinner knits may curl. I never had that problem, but if you do I suggest starting with more stable knits like ponte, using a walking foot and making sure you are using a ballpoint or stretch needle.Typically sewing with knits means you are looking for no ease or even negative ease. This means you do not want any wearing ease (a knit garment stretches with you eliminating the need) or design ease (knit garments are typically fitted). In a knit garment no ease (meaning the finished measurement equals your body measurement) means the garment will just skim your body. If you want a truly fitted look you actually want negative ease, which means that the finished measurement is actually smaller than your body measurement. Think of a bodycon dress or a fitted tee, the dress or tee stretches as you put it on-that’s negative ease meaning the garment is smaller than your measurements. Even if you don’t desire a fitted look keep in mind that knits typically give over time so if you sew a garment with no ease eventually that garment will go from skimming the body to being a little loose. When sewing with knits I almost always use negative ease. I see your eyes glazing over…let me walk you through an example.
Example 1: Fitted Knit Garments
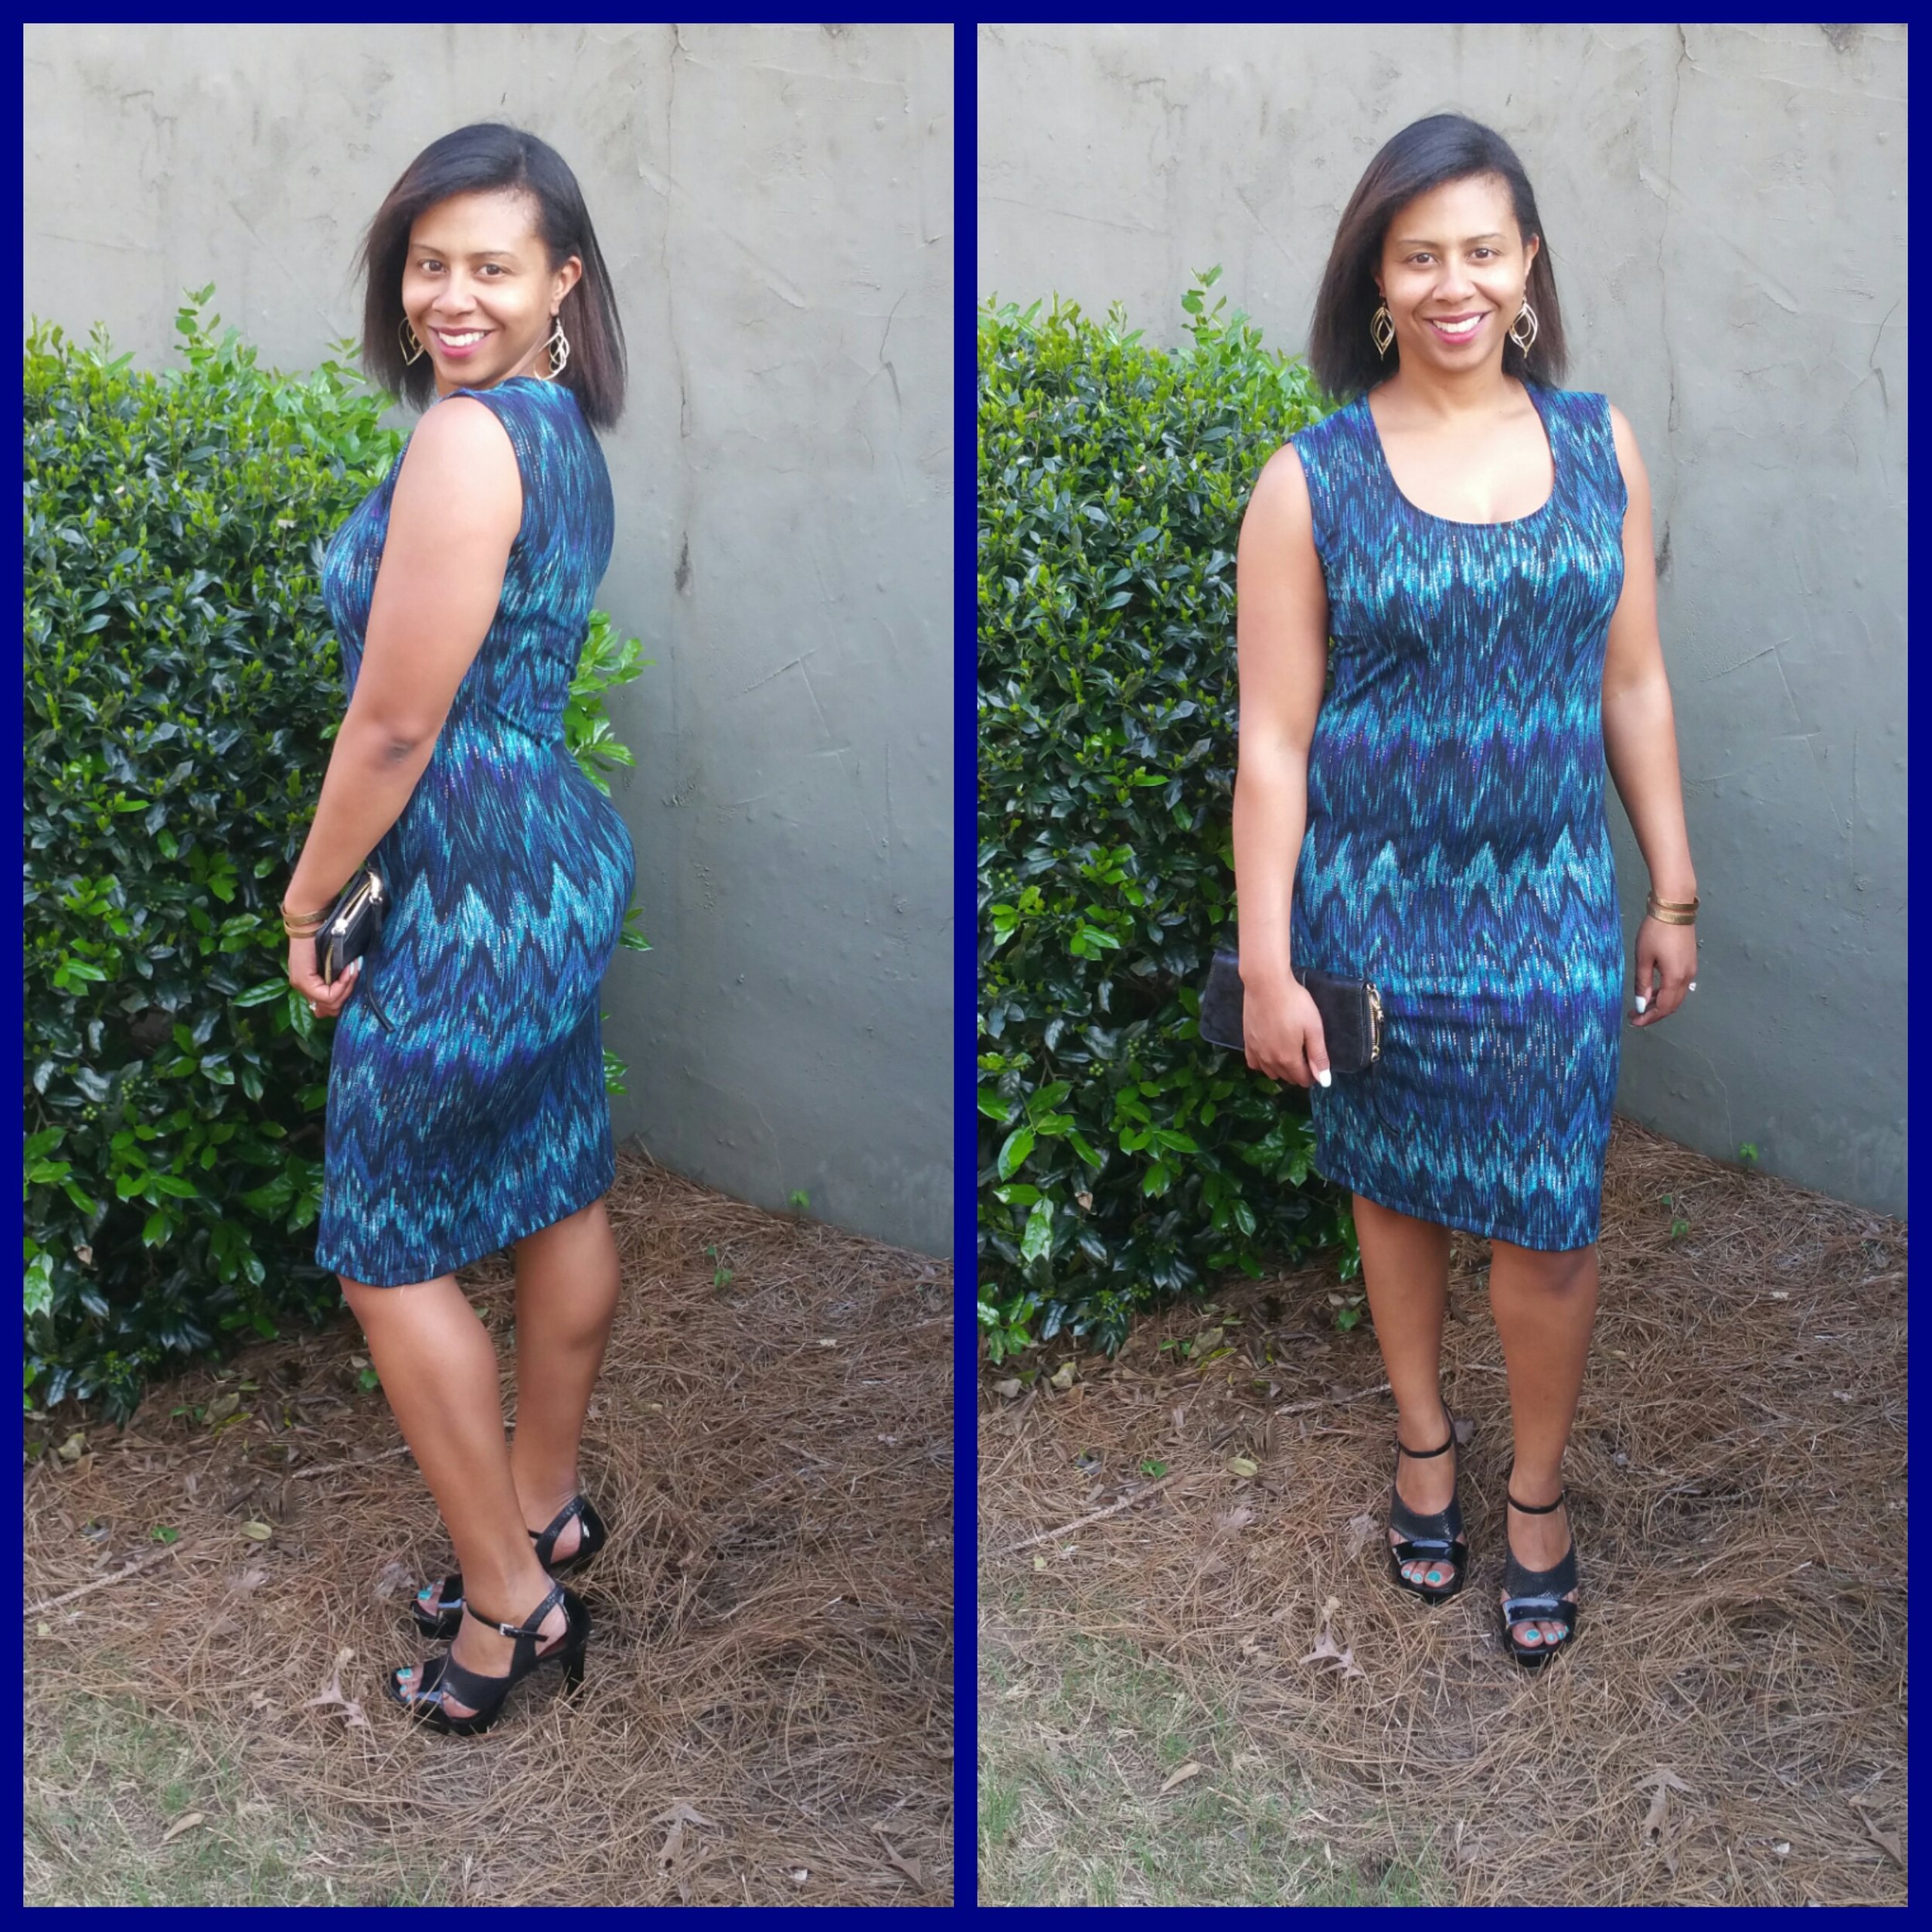 I’m going to use McCalls 6886 as our knit pattern example. M6886 is considered a TNT (tried and true) pattern by many because it is a simple pattern than can be created with as little as two pattern pieces. I love this pattern and have made it twice already.Our example model, I’ll name her "Nikki", measures a 37” bust, 30” waist and 40” hip. I would guess that Nikki wears a 10 in RTW, but based on her measurements McCalls size chart says she wears a 16!
 Instead of going by the size chart which we know has deceived us in the past we will review what we know. This is a knit dress that Nikki wants to be fitted. We know for a fitted look using a knit we need negative ease, but how much? Depending on the stretch of the fabric I’d say 1-2”. A jersey stretches more than a ponte so maybe I’d use 2-2.5” of negative ease for jersey but only 1-1.5” of negative ease for ponte. For this example we will assume that our knit has moderate stretch and go for 2” of negative ease which means we need to subtract 2” from Nikki measurements to find our desired finished measurements for Nikki that would be a 35” bust, 28” waist and 38” hip. Looking at the finished measurements this most falls between a 12 or 14. I would cut a 12 personally because again knit stretches and I like fitted garments, however if you are unsure, have a less stretchy knit or don’t want anything too snug go for the 14 because you can always take it in, but you are very limited in letting it out.
 Notice this does NOT match the size charts recommendation. If we had cut a 16 I guarantee that this dress would swallow Nikki. How do I know this? Well, first experience –practice is the best teacher, but secondly by the finished measurements on the pattern. A size 16 would have produced a dress with finished measurements of 38” for the bust, ? for the waist and 41.5” for the hip. These measurements all show a positive ease which would equal a baggy dress.Let’s move on to wovens. I honestly, am still trying to perfect this as wovens are not as forgiving as knits when it comes to fit, but the same principles apply. A poor fit in a woven garment results in pull lines or gapes or worse a garment that can’t be worn at all.When working with wovens, similar to knits, the amount of ease you want depends upon the fit you are trying to achieve for a fitted look (like strapless bodice or pencil skirt) you probably want to stick to about only 1.5-2” of wearing ease. No design ease is necessary. If you are using a pattern that is more flow-y or full (like a tunic or A-line skirt) you want additional ease. In this case just fit the part of the body where the garment is tightest for a dress most likely the bust, for a skirt the waist or hip.
Example 2: Fitted Woven Garment
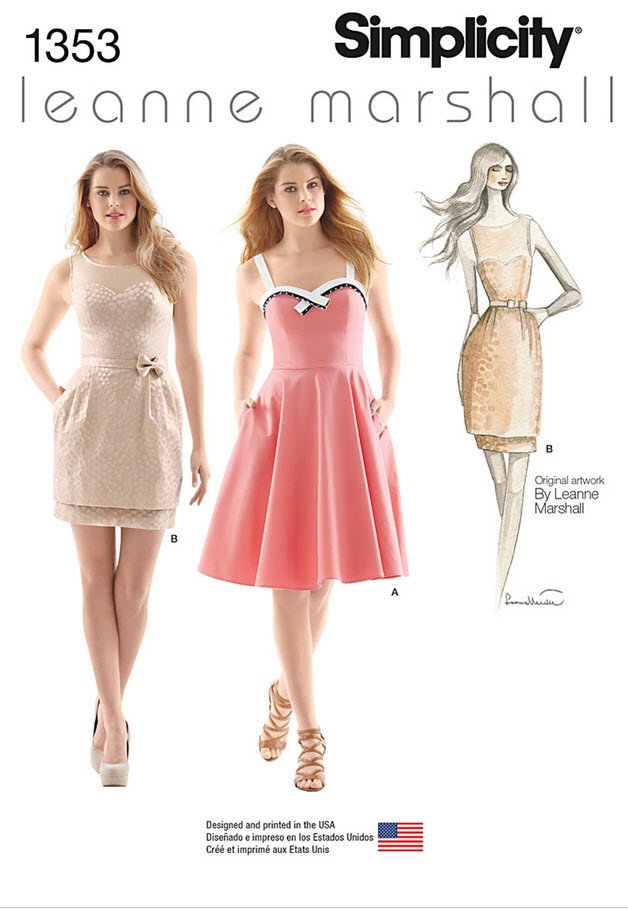 Let’s take Simplicity 1353 Leanne Marshall dress that has a fitted bodice and both a fitted and full skirt option. Using the same model Nikki (37” bust, 30” waist and 40” hip), let’s first look at the body measurements highlighted in yellow. According to the body measurements Nikki would again need a 16.Starting with View B, the fitted skirt, let’s take a moment and consider how we want the dress to fit. The bodice and skirt of this dress is quite fitted so we only need wearing ease or "wiggle room". I would allow 1.5-2” of ease in the bust, 1.5-2” of ease around the waist and 2” in the hip of the underskirt. Now we are looking for fitted measurements close to 38.5” bust, 31.5” waist, 42” hip. Though pattern doesn’t list the finished measurement for the waist I can see based on the bust and hip that Nikki likely needs a 16. WOW the size chart was right this time!
 Now let’s look at View A, the full skirt option. For View A the hips don’t matter (that’s partially why the finished measurements aren’t listed on the envelope). They don’t matter because the skirt it so full that it will accommodate a person with narrow or wide hips just fine. For a dress like this just fit your bust. If there is a finished waist measurement on the pattern tissue then you may want to check it for fit, leaving about 1-1.5” of ease for wiggle room.
Example 3: Flow-y Woven Garments
 Now for an example where extra ease is actually what you want we will look at Simplicity 1104 one of my favorite summer Simplicity patterns. Using Nikki’s measurements again Simplicity’s size chart suggests a 16.
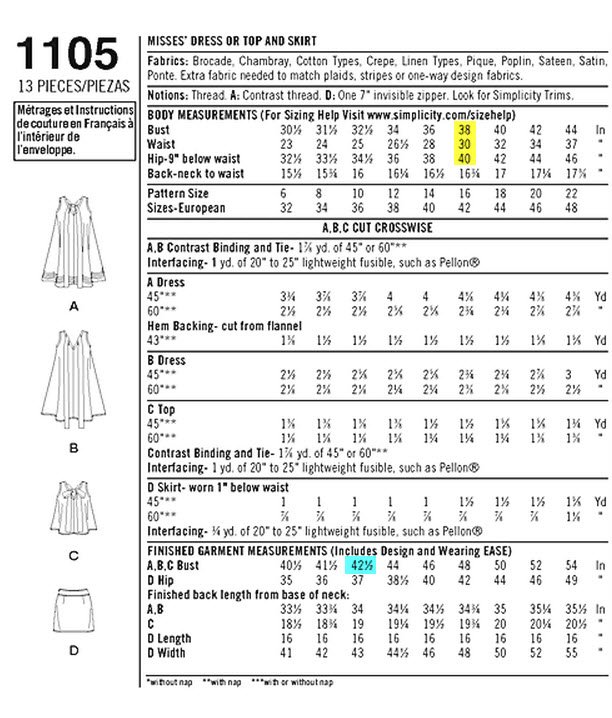 This dress is quite flow-y so we definitely want wearing and design ease to achieve this look. We only have to worry about the bust fit here as this trapeze dress doesn’t touch any portion of the lower body and should flow nicely for either a slender, athletic or curvy woman. If we didn’t include additional design ease this dress would have a fitted bodice and wouldn’t flow like on the pattern envelope model. Wearing ease is about 1.5” and we will add another 3” **Edit I would add 5" now due to more experience** for design ease which equals 4.5” of ease. **edit 6.5" of total ease** Add that to Nikki’s 38” bust and we get a 42.5” finished bust measurement **Edit 4.5" finished bust measurement** . Looking at the envelope we can see 42.5” matches a size 10. **Edit Size 12 has a 44" measurement so lets go with that one** A size 16 has a 48” finished bust which is 10” more than Nikki’s bust measurement or 10” of extra fabric around Nikki’s bust. I would not consider that flattering and feel that this pattern allows entirely too much design ease.
Example 4: Flow-y Knit Garments
One last example to demonstrate when positive ease is used in a knit garment is McCalls 6752.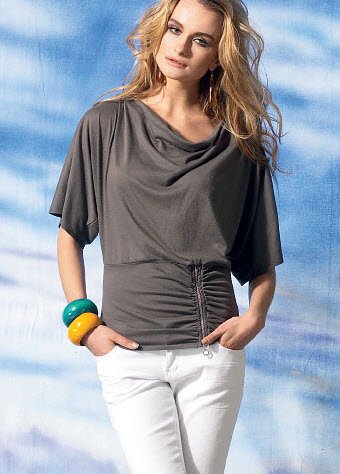 M6752 Views A & B feature a loose fitting draped bodice. So this is an exception where to don’t want a knit garment to be fitted. Instead of negative ease you want positive ease. To allow for the draped affect I would say you need about 4” of design ease, so add 4” to Nikki’s 38” bust measurement for a 42” finished bust measurement. The nearest to this is a size 14 which is still smaller than the size 16 the size chart recommends. The size 14 skirt will be fine though it certainly won’t be fitted (the pattern envelope doesn’t show it as fitted) , if Nikki wanted a more fitted skirt you’d have to size down to a 12.
 I sincerely hope this helped someone or at least didn't confuse anyone more than they already were. I will answer any questions to the best of my ability. Please post them here in the comments (click the plus sign to comment).For those who read this but now realize you fall between 2 or more sizes, my next frougie tip will be on how to grade between sizes.